環境:Unreal Engine 5.4.4、Houdini 20.0.751
Houdiniで簡単な自動車モデルをつくり、UEのChaos Vehicle プラグインで動かせるようにすることが今回の目的です。
Houdiniでクルマのモデルをつくる
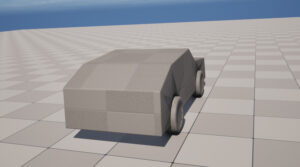
押し出しツール等で簡単なHoudiniのクルマをつくった。
車輪の半径はのちにUEで設定することになるので意識しておく。
ここでは直径60㎝でつくった。
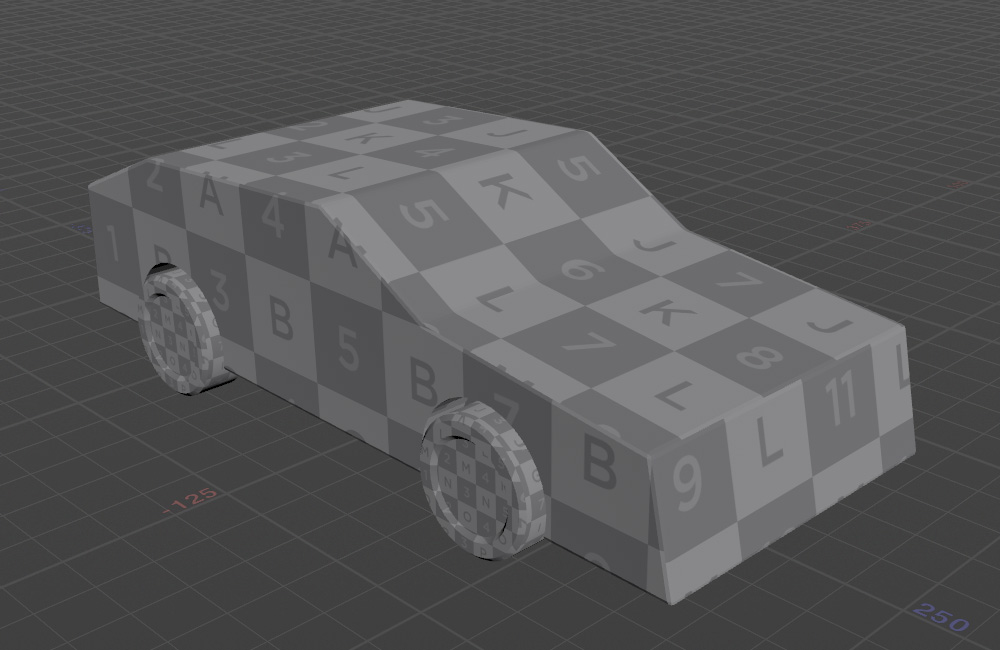
車体と車輪4つを別オブジェクトに分けた構成にする。
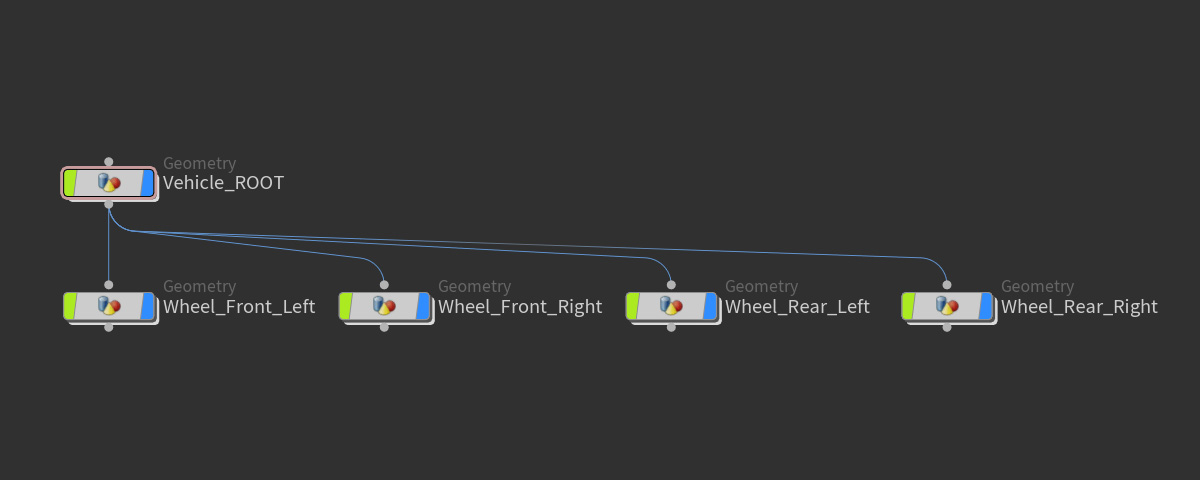
車体が親で車輪が子になるような階層にする。オブジェクトにつけた名前がそのままボーンの名前になる。
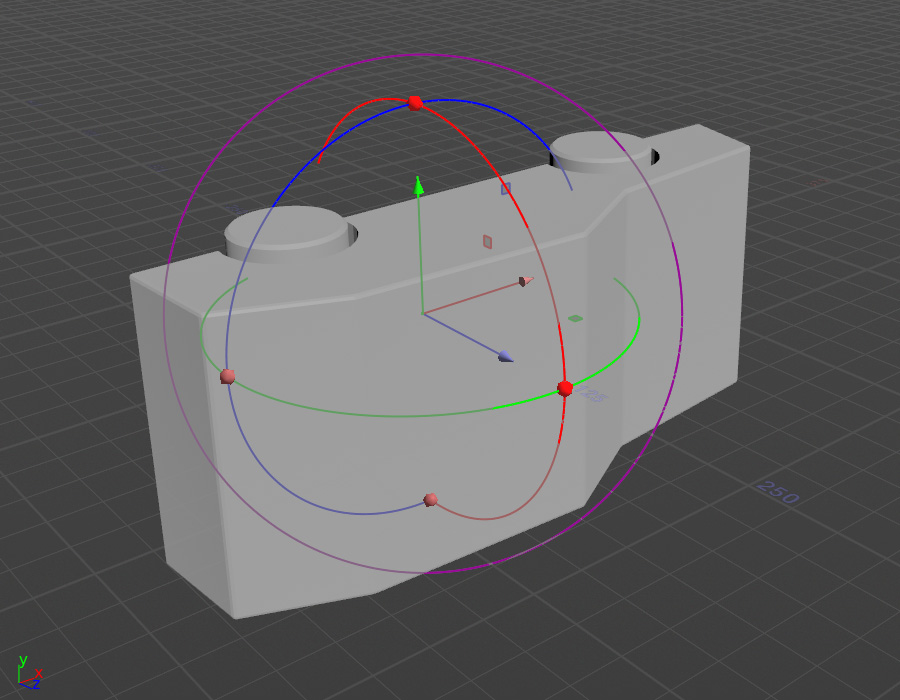
出力するときはUEの座標系に合わせて、X軸を前に、Z軸が上になるように回転させておく。これをしておかないとChaos Vehicleが上手く動作しない。
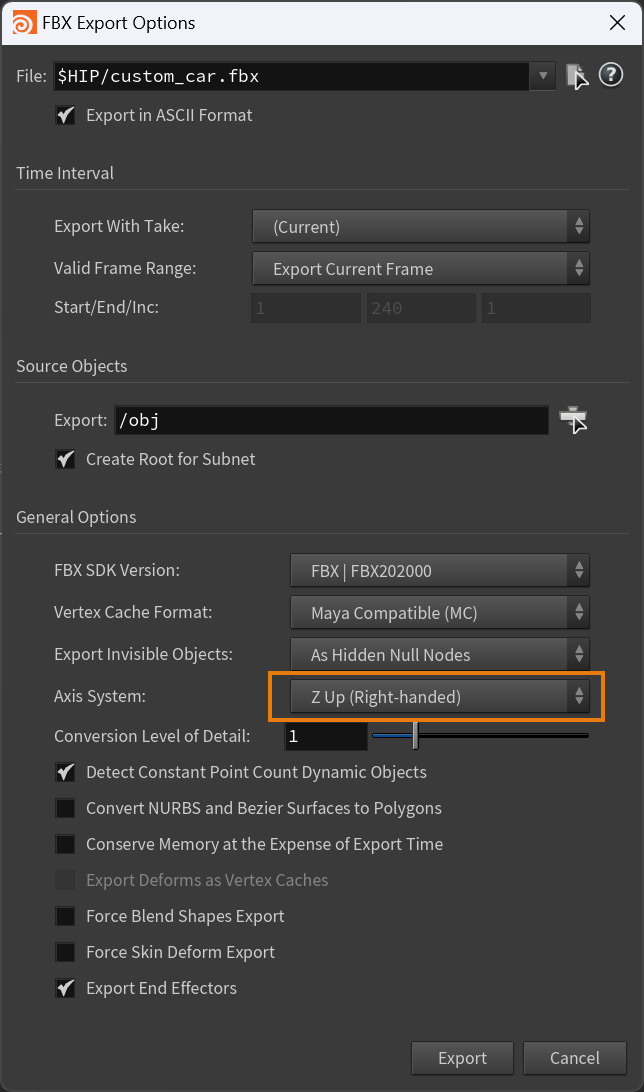
File > Export > Filmbox FBX
でFBXの出力をする。Z軸を上に設定する。
UEでインポートする
Edit > PluginsからChaos Vehicle Pluginを探し、これにチェックをしてエディタを再起動する。
FBXファイルをコンテンツブラウザにドロップする。
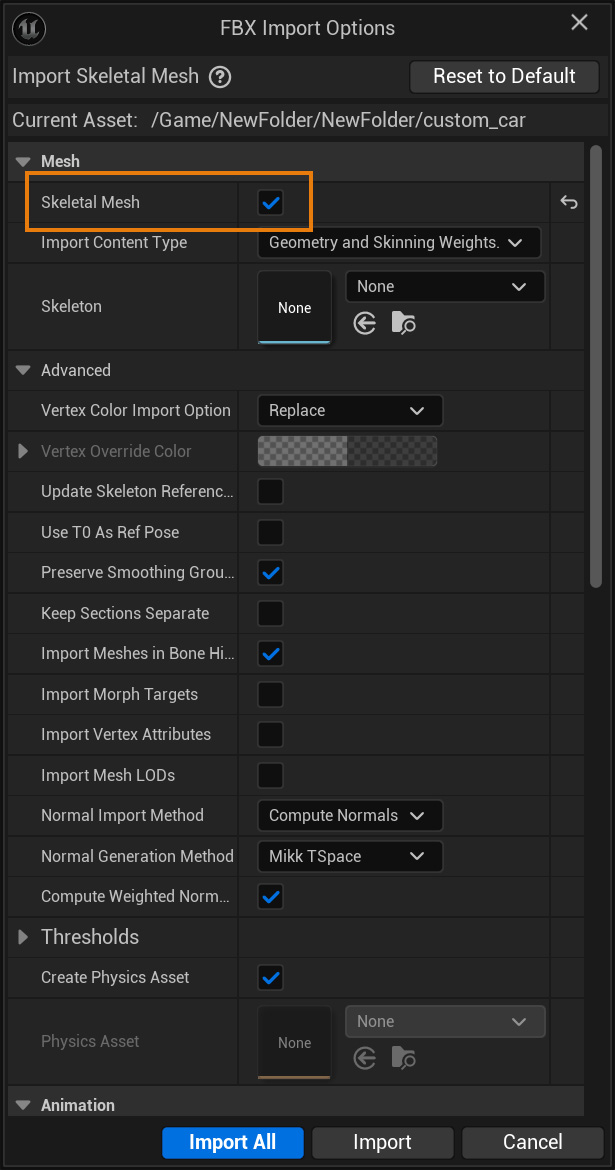
インポート設定で、Skeletal Meshにチェックをする。
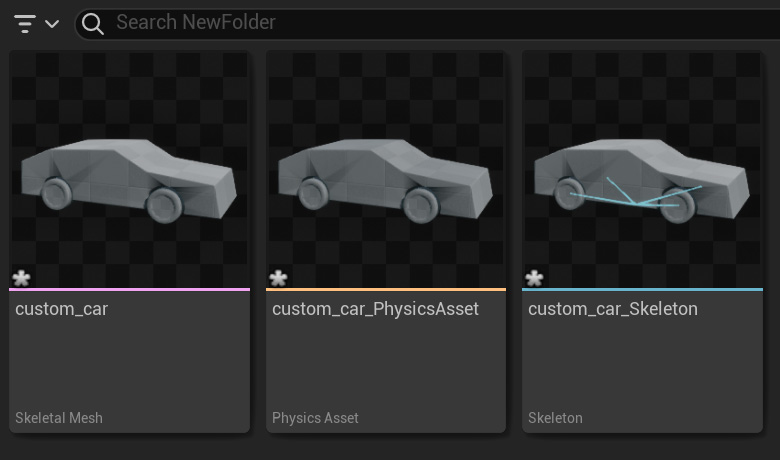
Skeletal Mesh以外にPhysics AssetとSkeletonがつくられる。
以後はSkeletal Meshだけ更新すれば他も更新される。
アセットの設定
Physics Assetをダブルクリックして設定をしていく。
車輪の設定
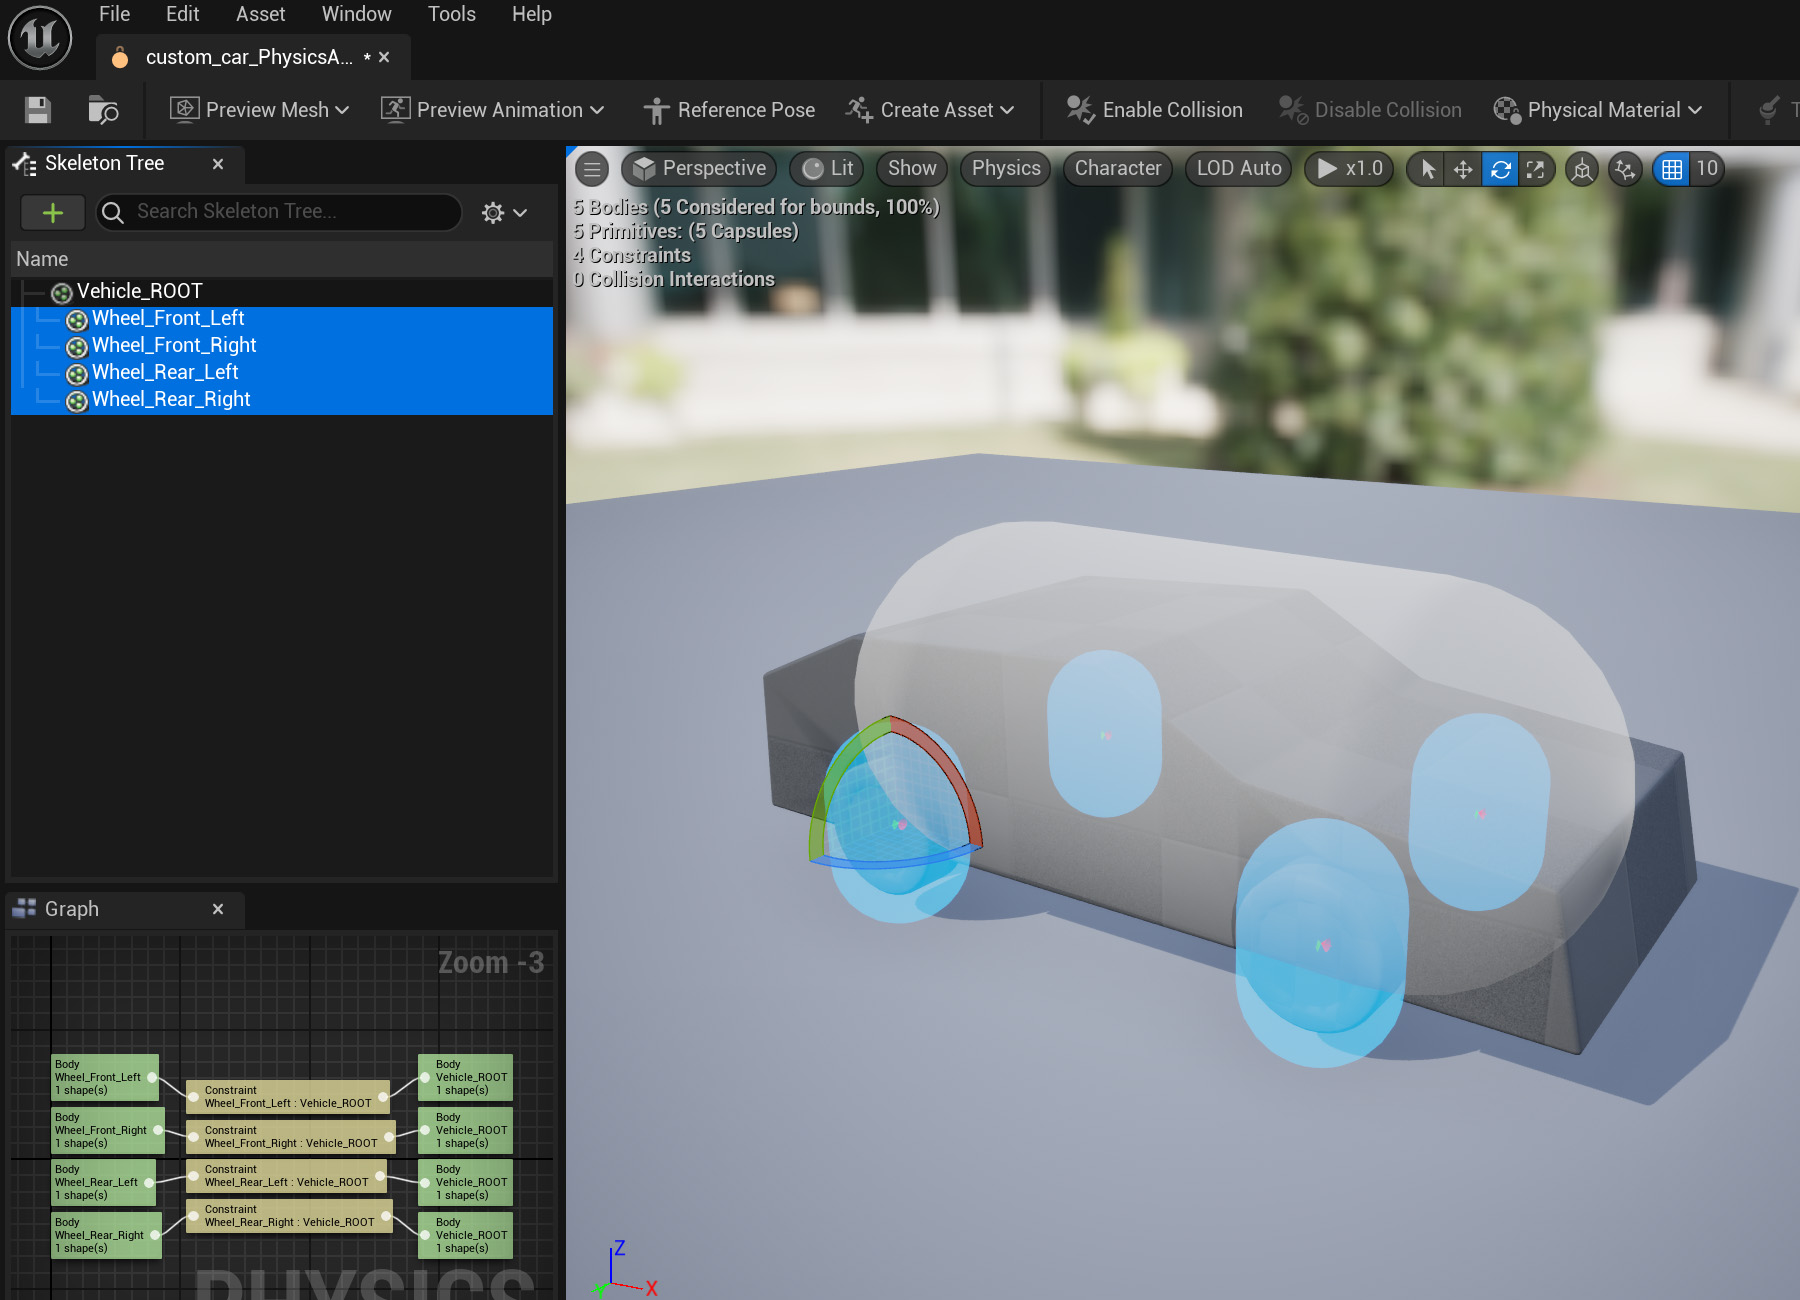
まずは車輪を編集する。Wheel_Front_Leftら4つを選択状態にする。
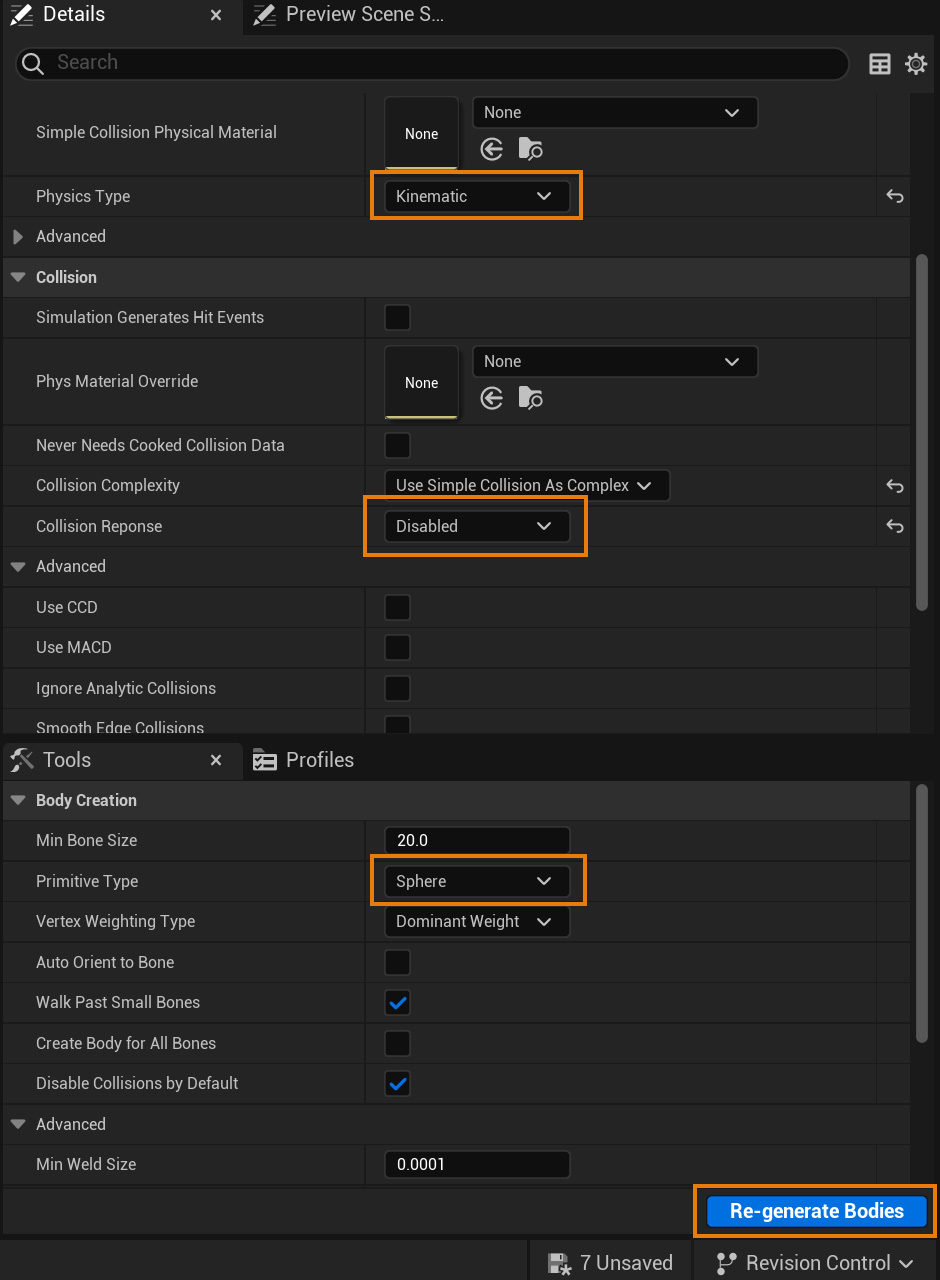
ToolsのPrimitive TypeをSphereにして、右下のRe-generate Bodiesを押してコリジョンを変更する。
Physics TypeをKinematicに、
Collision ReponseをDisabledにする。
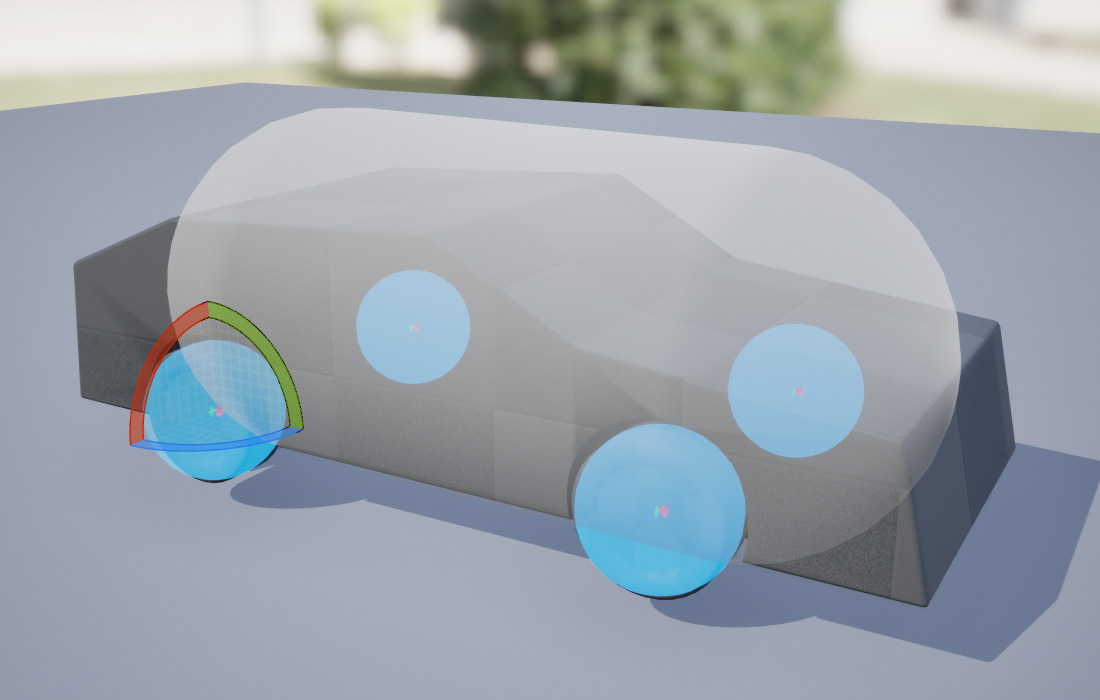
車輪のコリジョンモデルが球に変更された。
車体の設定
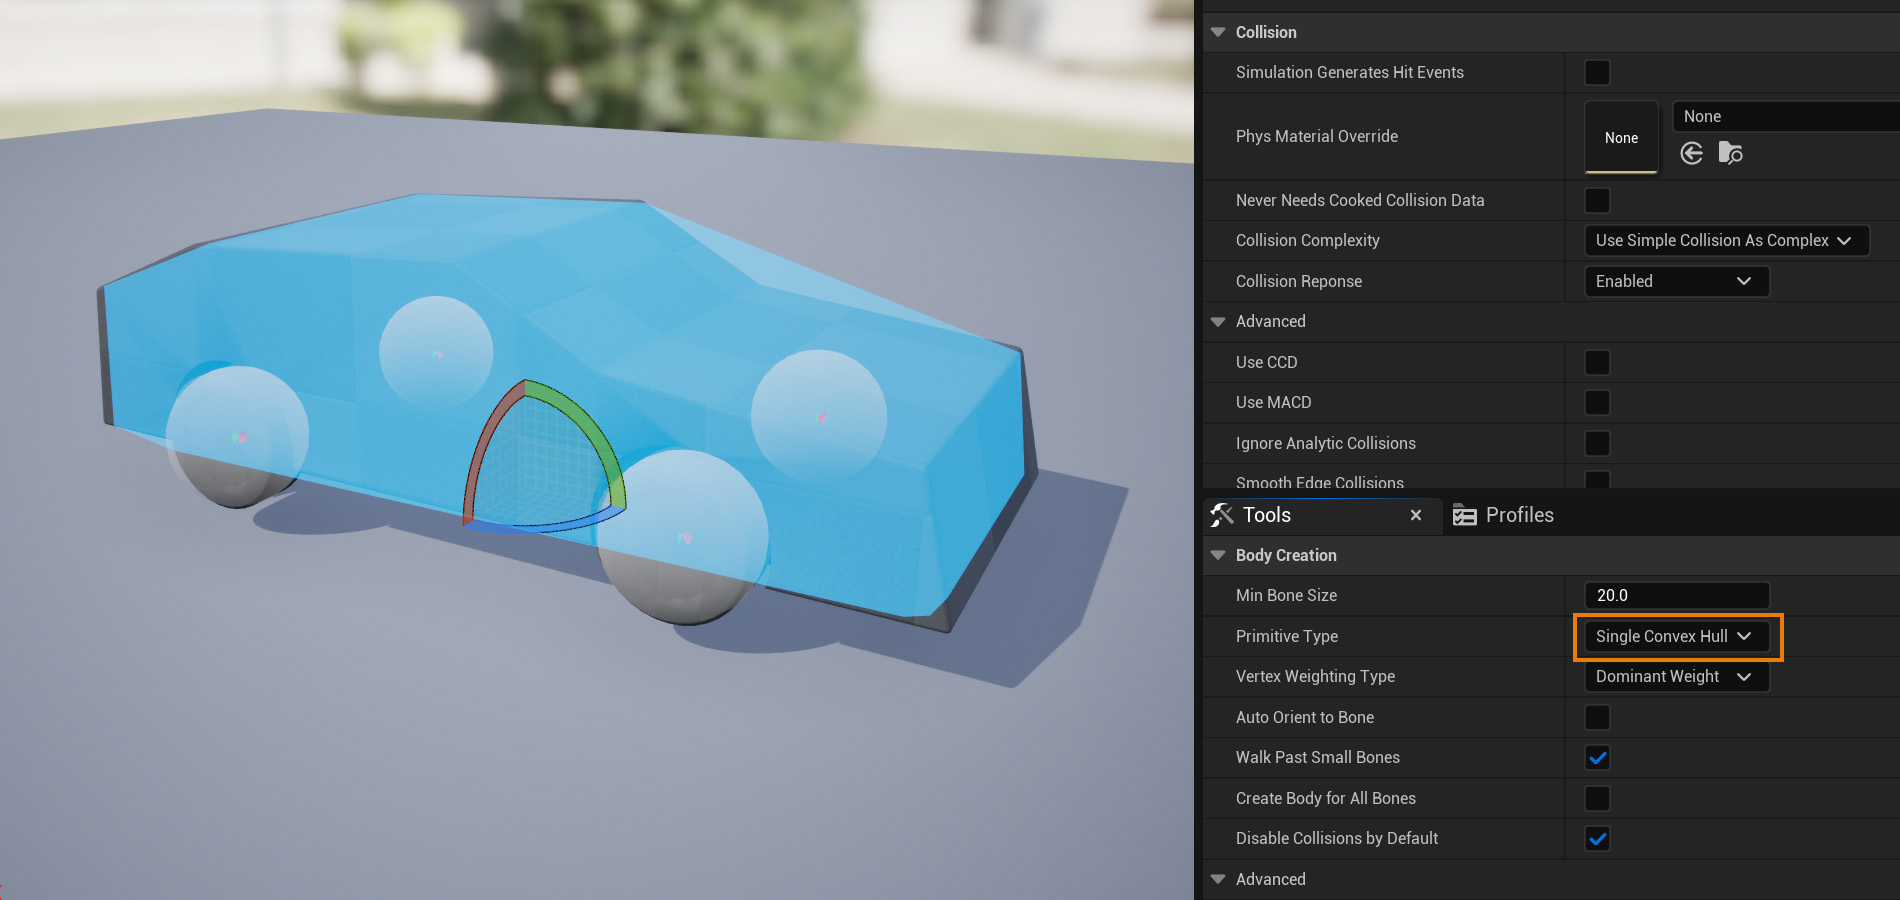
車体を選択して、コリジョンを設定する。Single Convex Hullで車体に合わせた形状にしてみた。
これでクルマのアセットの設定はほぼ完了。
ブループリントを作成する
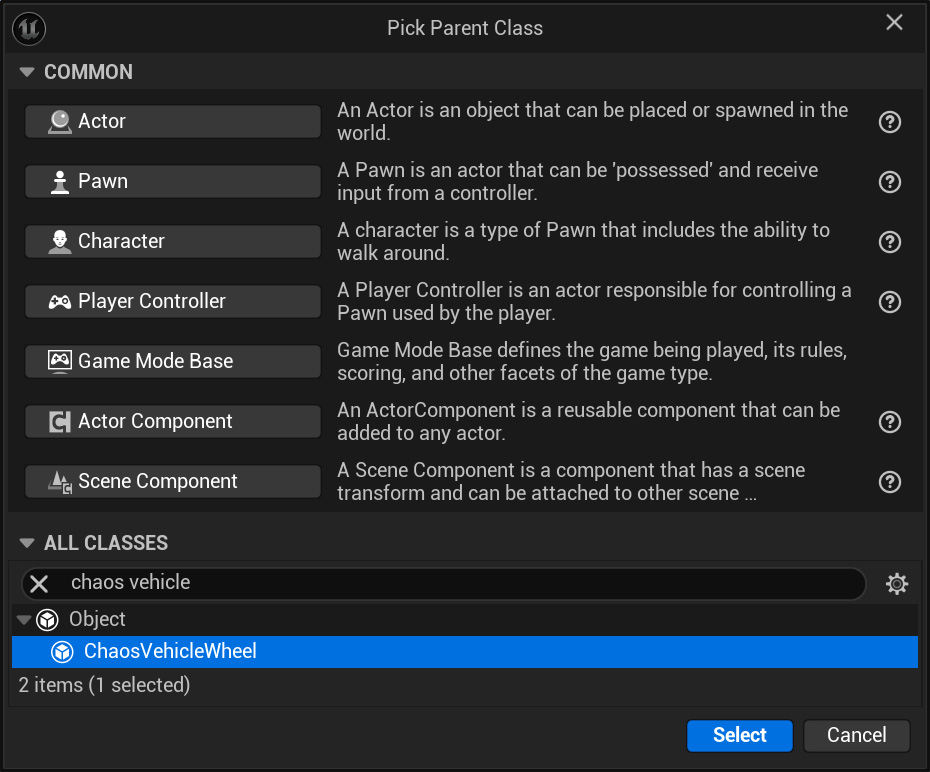
ChaosVehicleWheel
WheeledVehiclePawn
のふたつのブループリントを作成する。前者は車輪の処理、後者はアクセルやブレーキなどの全体の処理と管理をするPawnBPになる。
ChaosVehicleWheel
ブループリントをChaos Vehicle等で検索して探し、作成する。ここではFR車(フロントエンジン、リアドライブ)を想定して設定している。
まずは前輪から
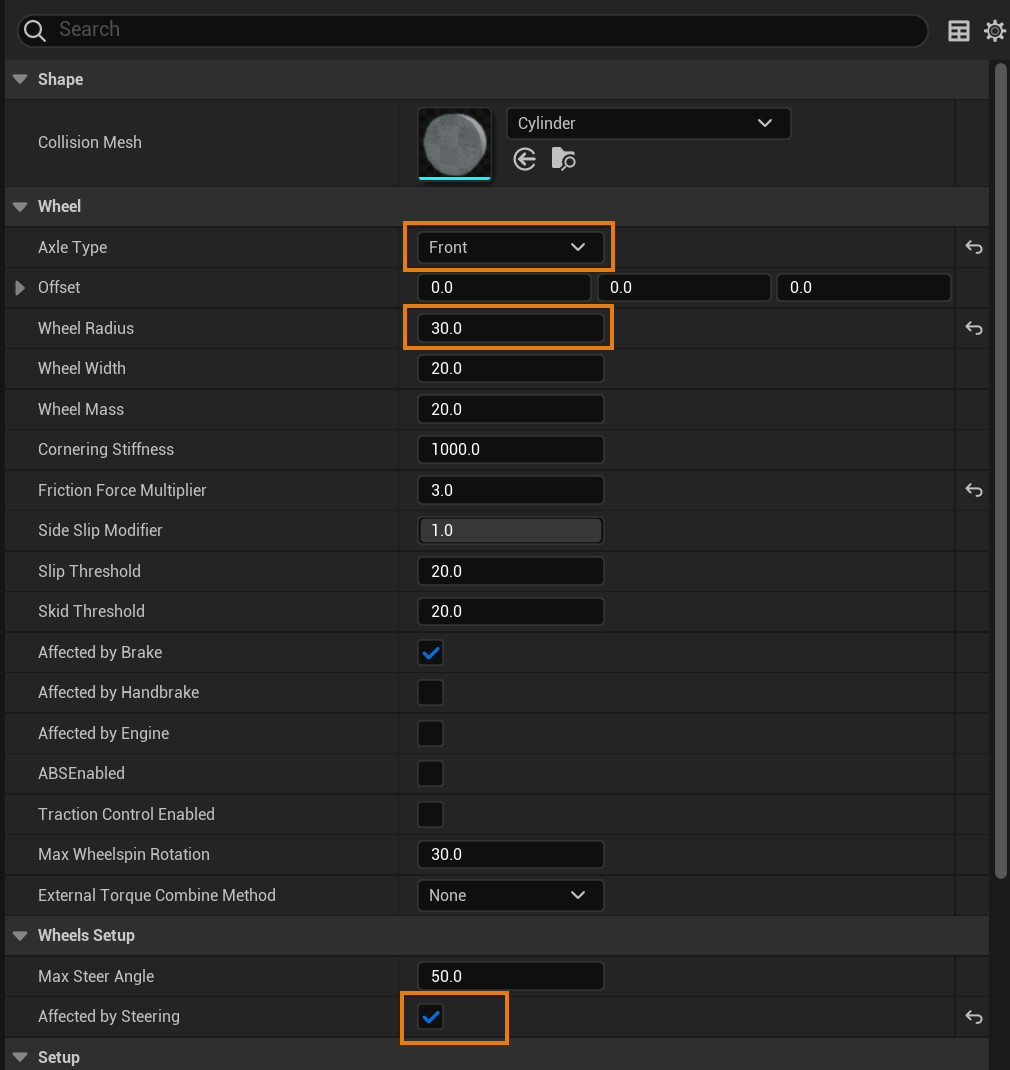
Axle TypeをFrontに
Wheel Radiusを車輪メッシュに合わせた値に
Affected by Steeringにチェックをする。
続いて後輪の設定。前輪のBPを複製して変更。

Axle TypeをRearに
Wheel Radiusを車輪メッシュに合わせた値に
Affected by Engineに。
WheeledVehiclePawn
WheeledVehiclePawnを検索して作成する。BPを開いたらプロパティを設定する。
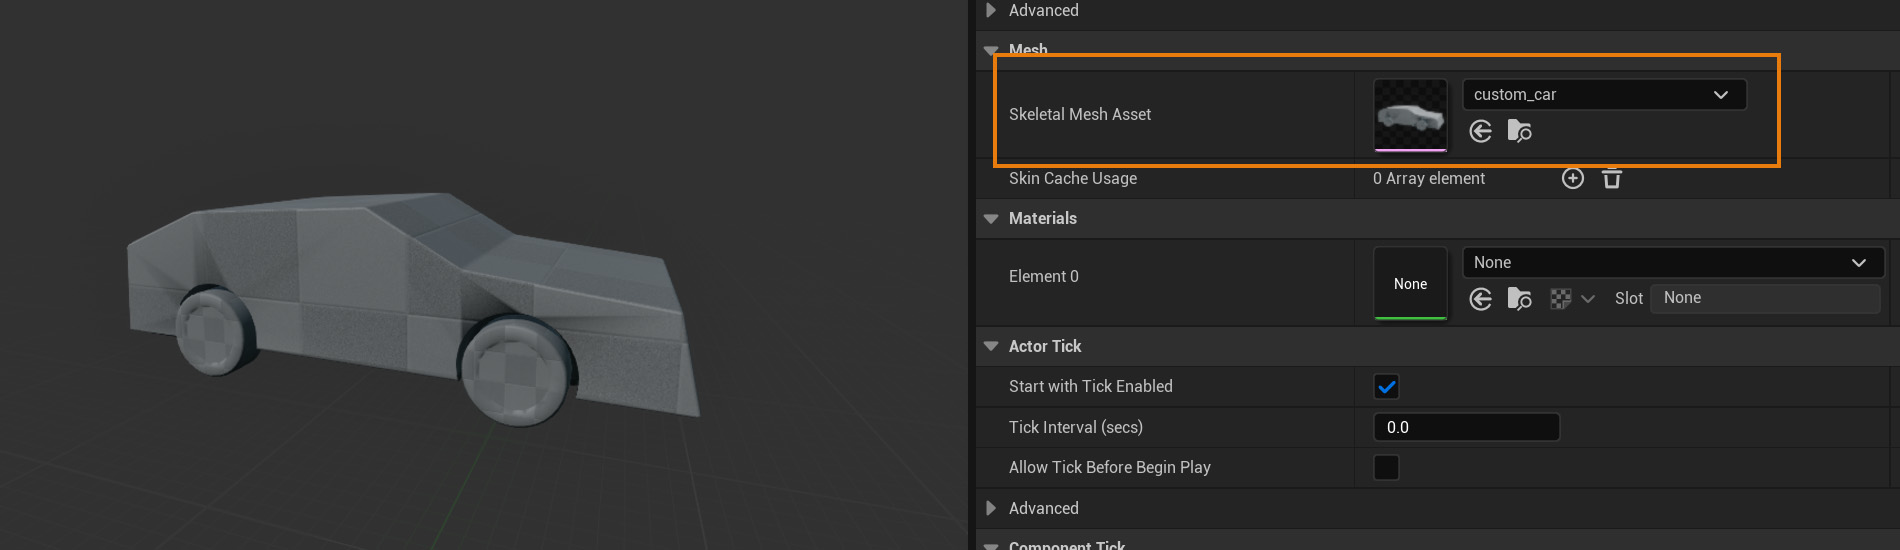
MeshにSkeltal Meshを指定する。
Simulate Physicsを探してチェックを入れる。
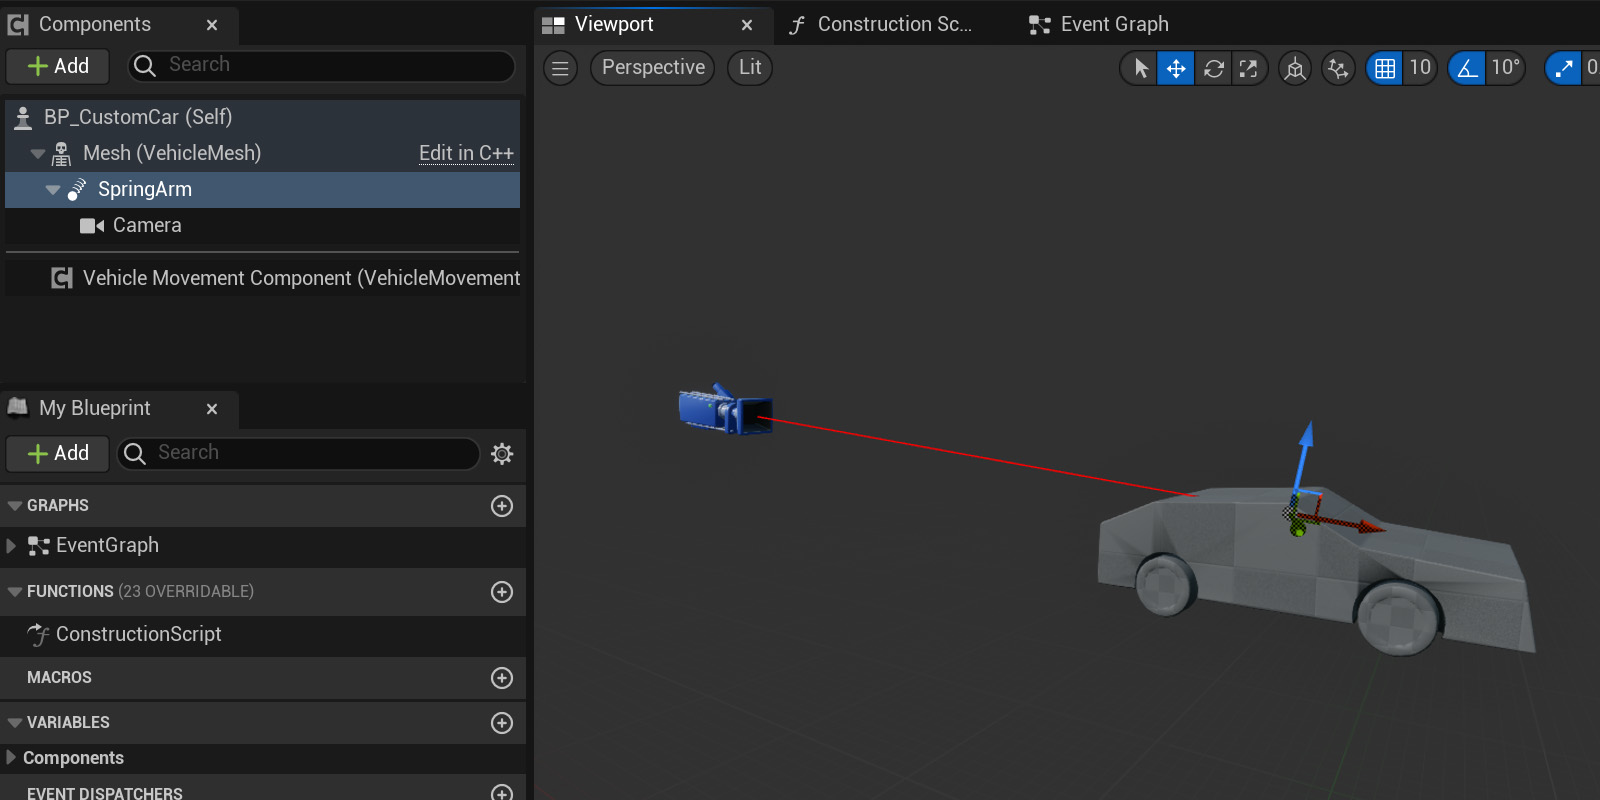
プレイヤーとして動かす時のカメラが必要なので、Spring ArmとCameraを設定しておく。
左のコンポーネントメニューからVehicle Movement Componentを選択して、車輪の情報を設定していく。
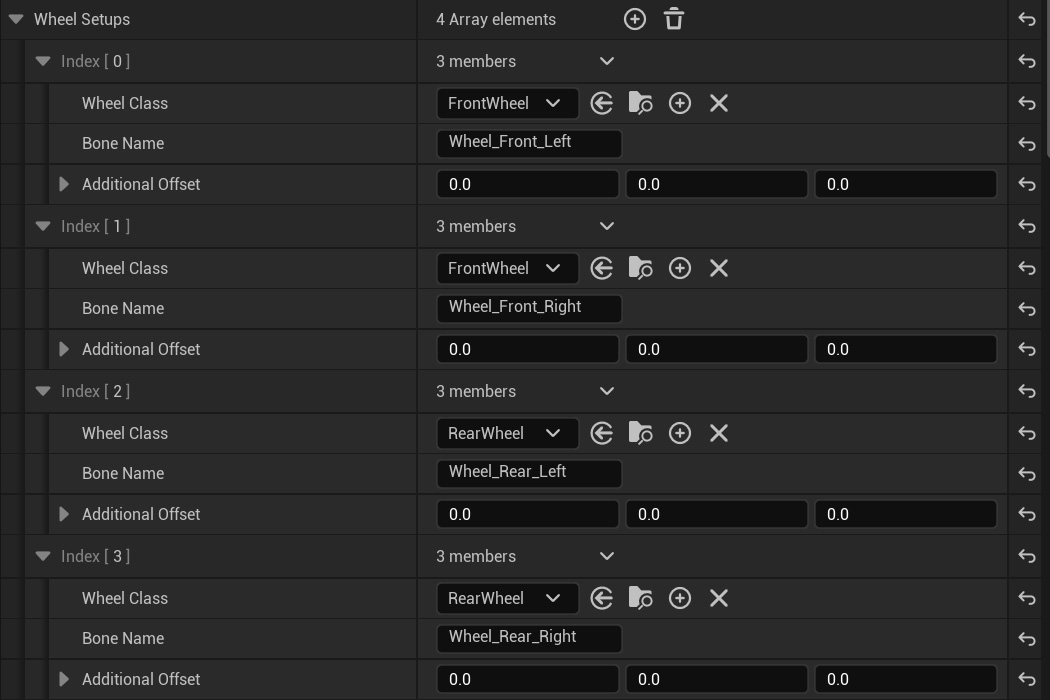
先ほど設定したChaosVehicleWheelクラスのBP(前輪、後輪)と4つのボーン名を入力していく。
つづいてエンジントルクのグラフを作成する。

Create External Curveのボタンを押して新しくカーブを作成する。
Timeが回転数、Valueは最高を1としたトルク(N・m)のカーブをつくる。最高トルクは別の項目Max Torqueで設定する。
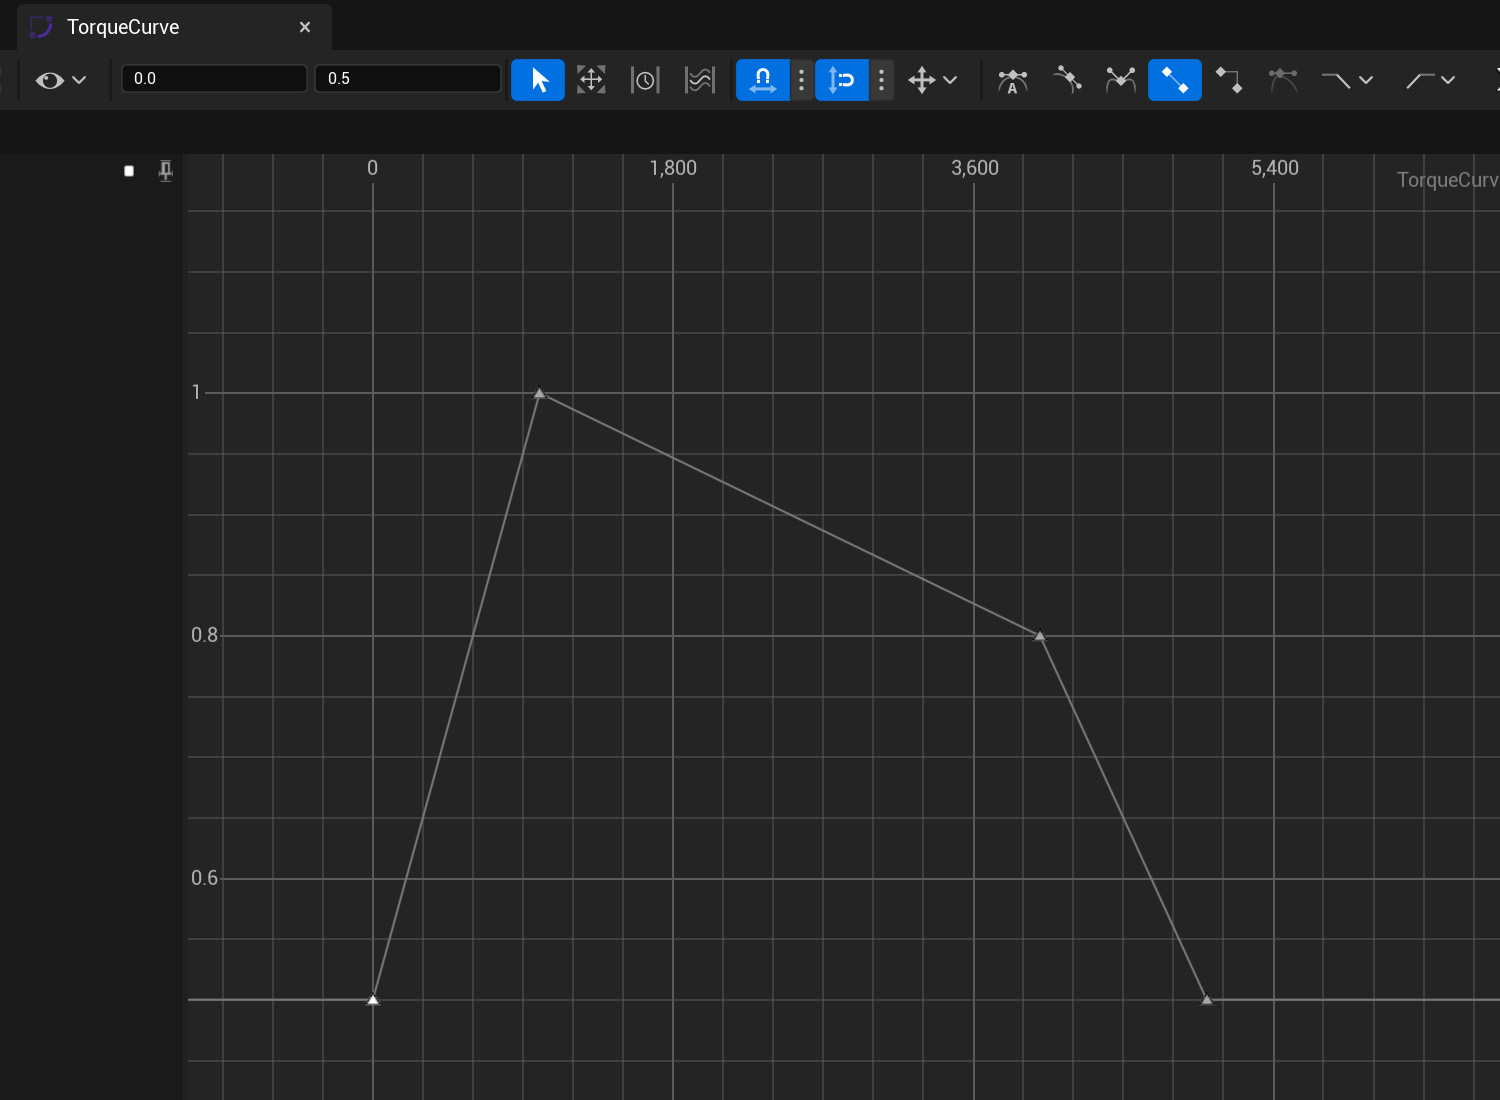
公式チュートリアルを参考に以下のように設定した。
Time:0, Value:0.5
Time:1000, Value:1000
Time:4000, Value:4000
Time:5000, Value:0.5
入力の設定
UE5のEnhanced Input方式でアクセルとステアリング、ブレーキ等の入力を設定していく。
Input ActionとInput Mapping Contextを作成する。
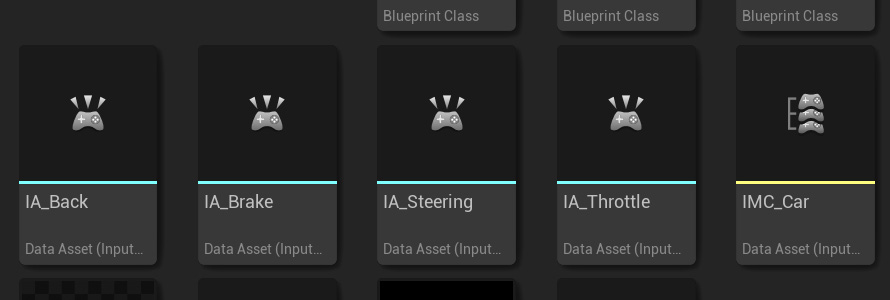
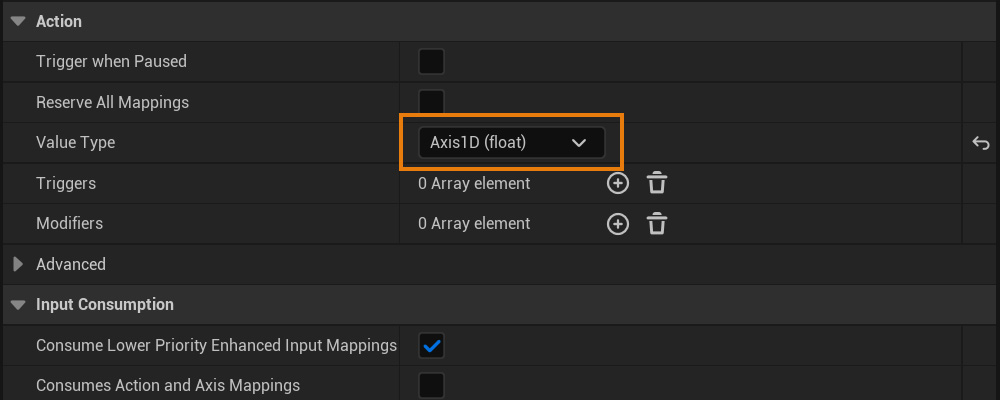
ValueTypeはそれぞれAxis1D(float)にしている。
Input Mappint Contextでは以下のようにまとめた。
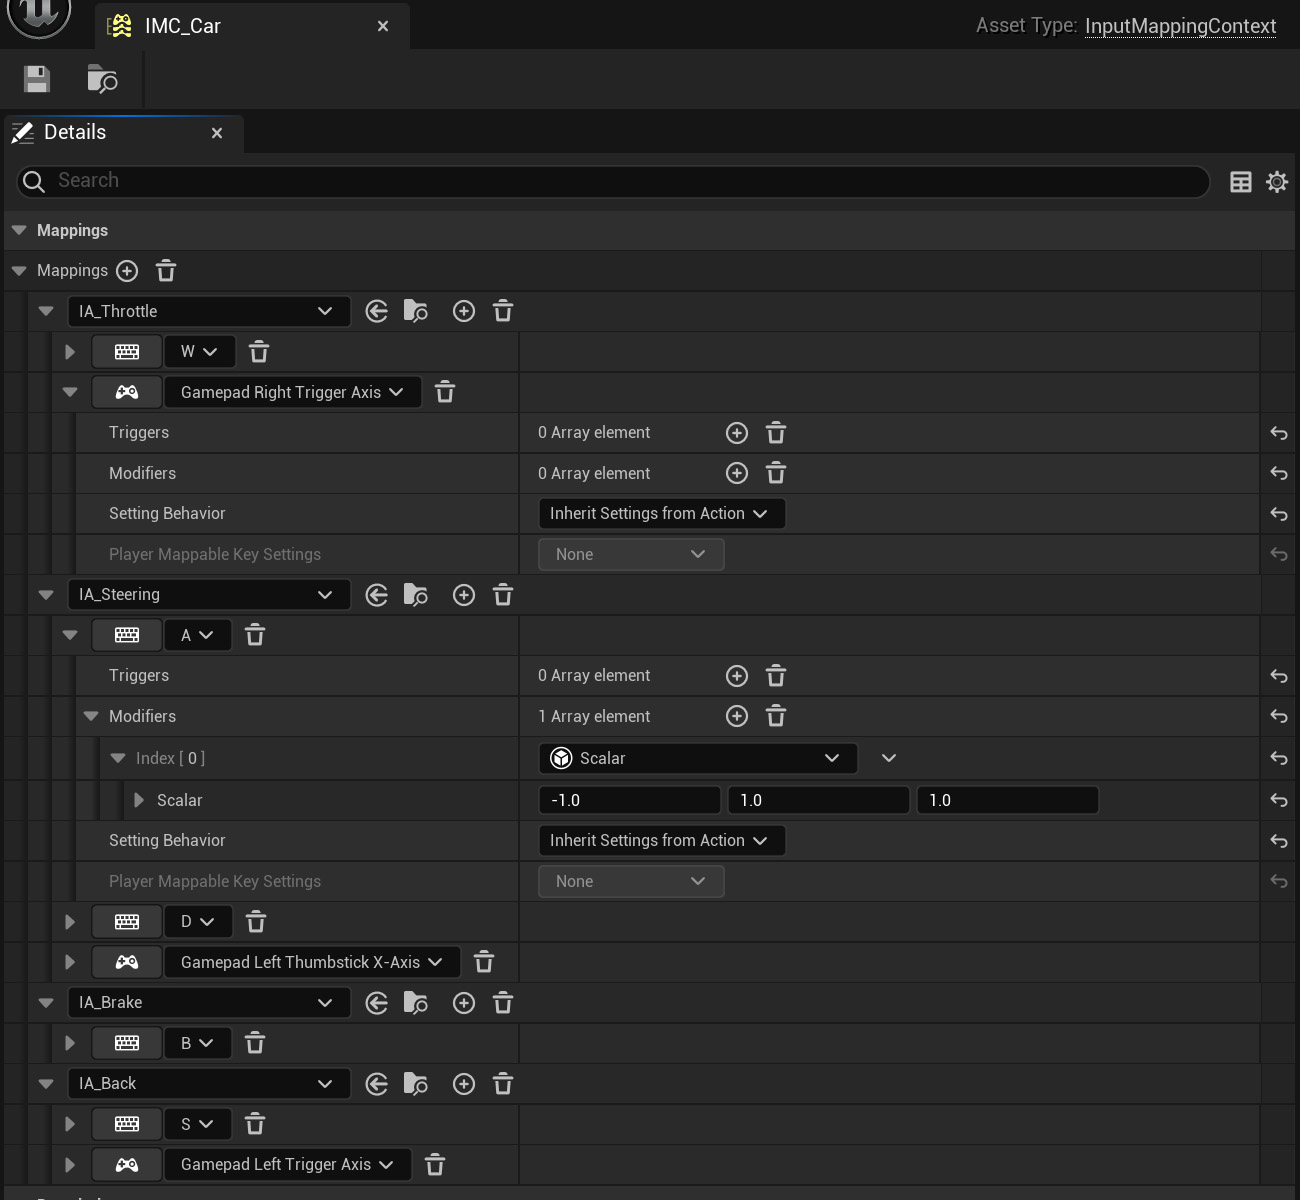
キーボードのWSAD、ゲームパッドで操作できるようにした。
Pawn BPに戻り、入力の処理をEvent Graphで設定していく。
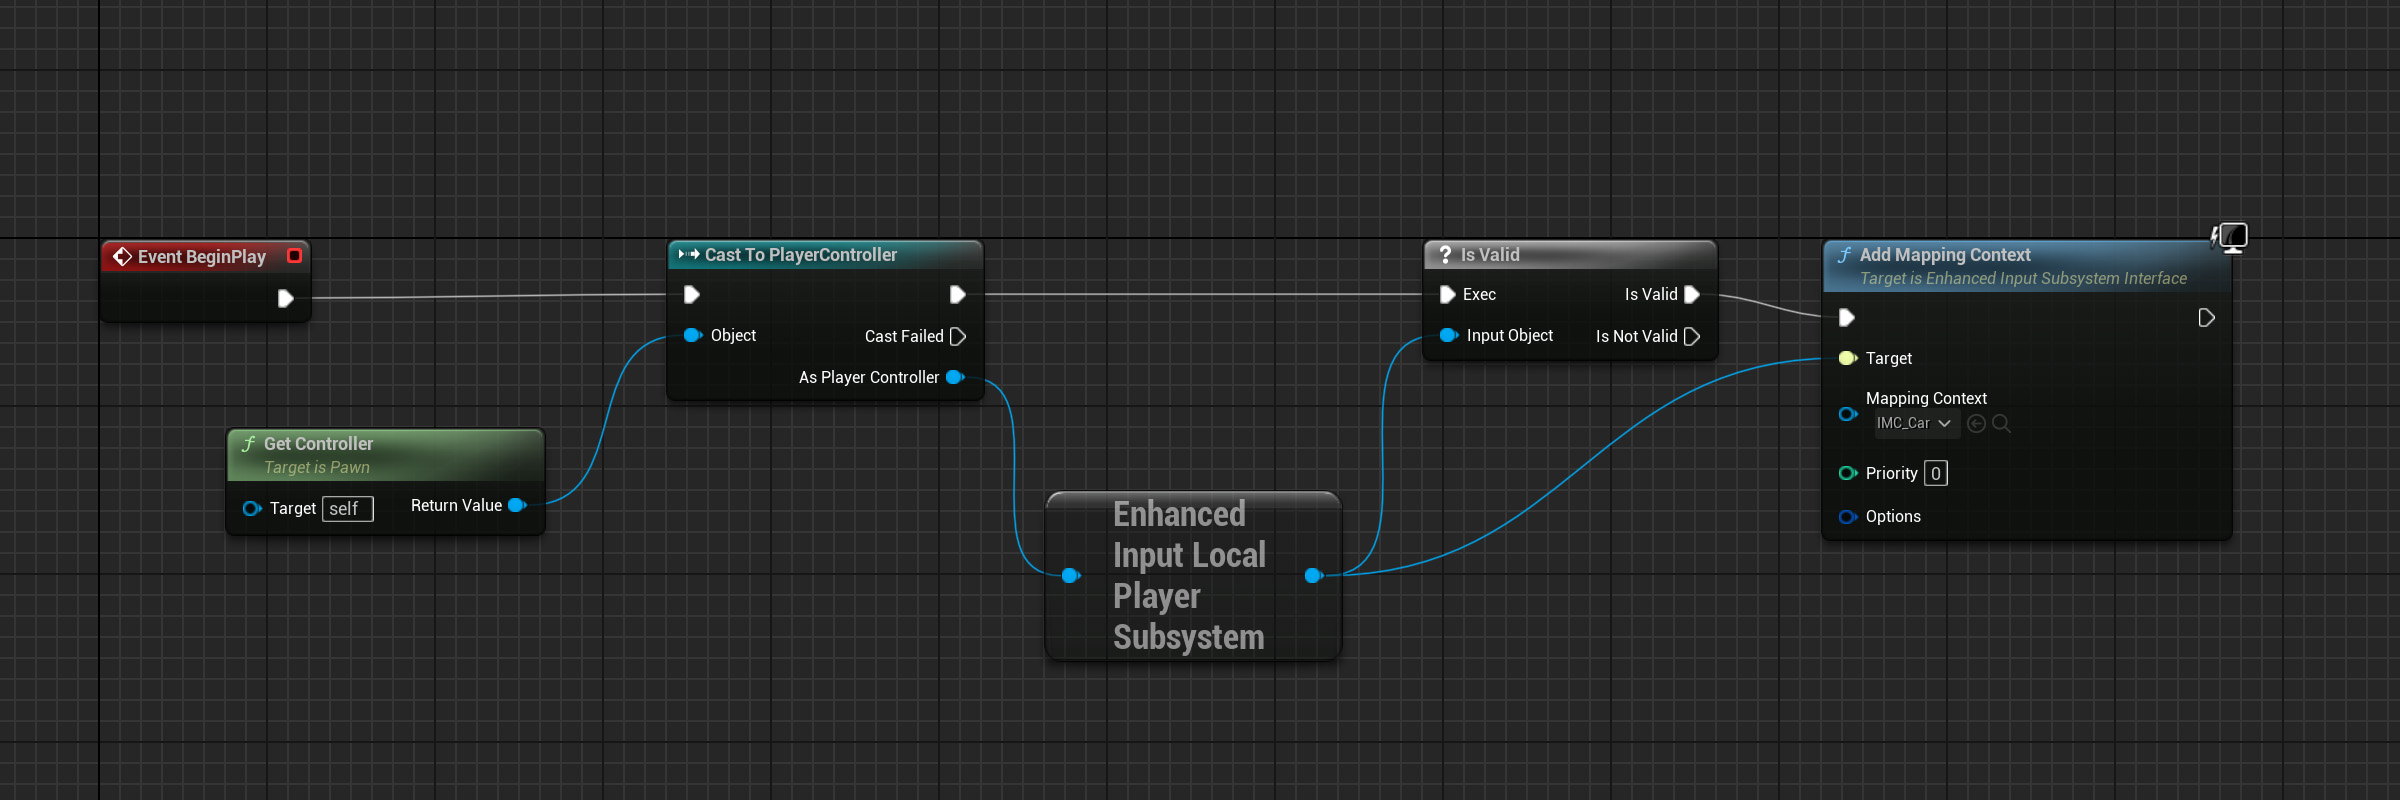
どのInput Mappint Contextを使うか、の設定したグラフ。
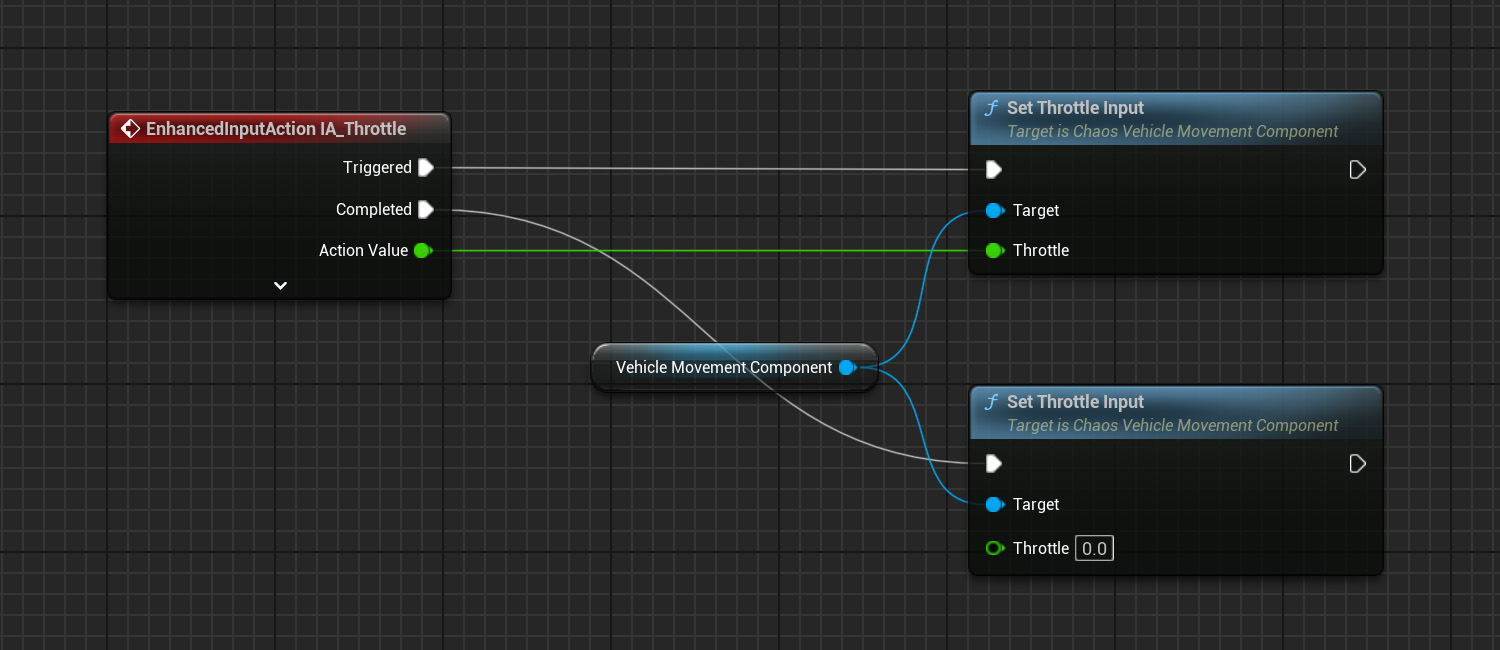
アクセルの動作
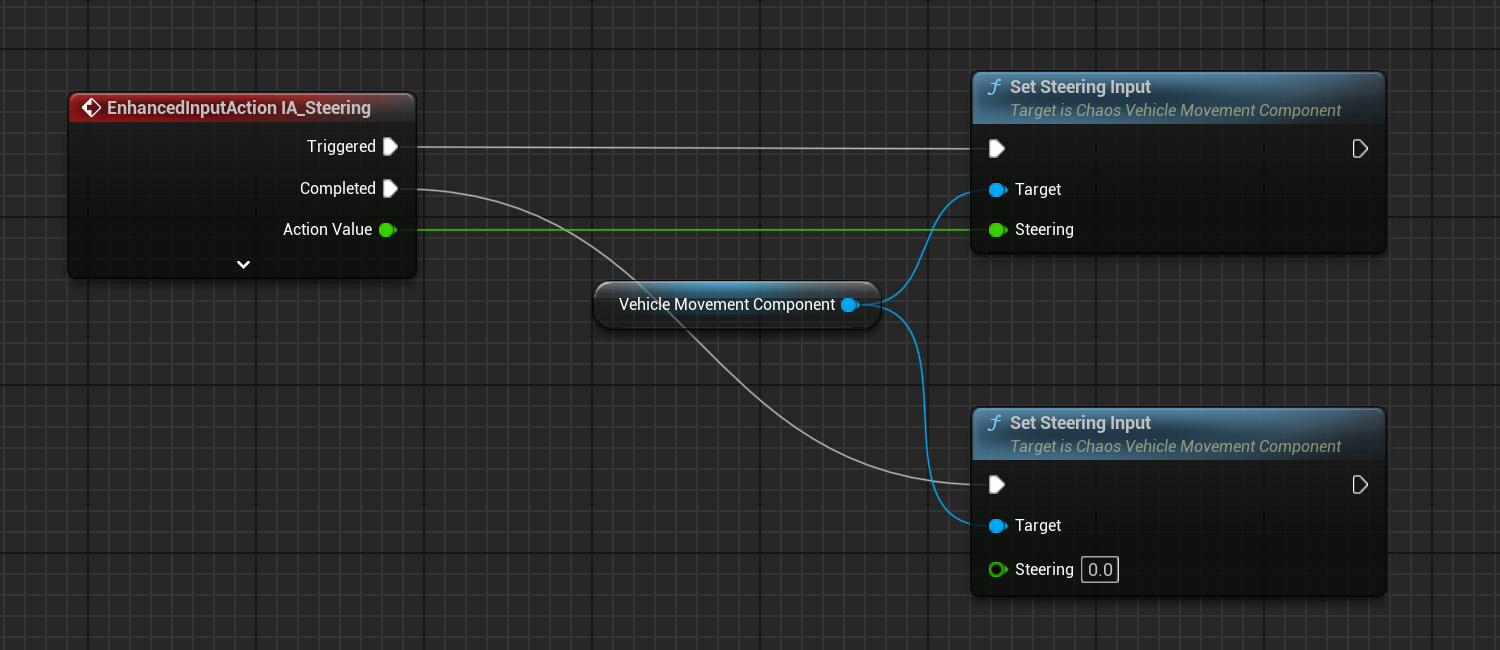
ステアリングの動作
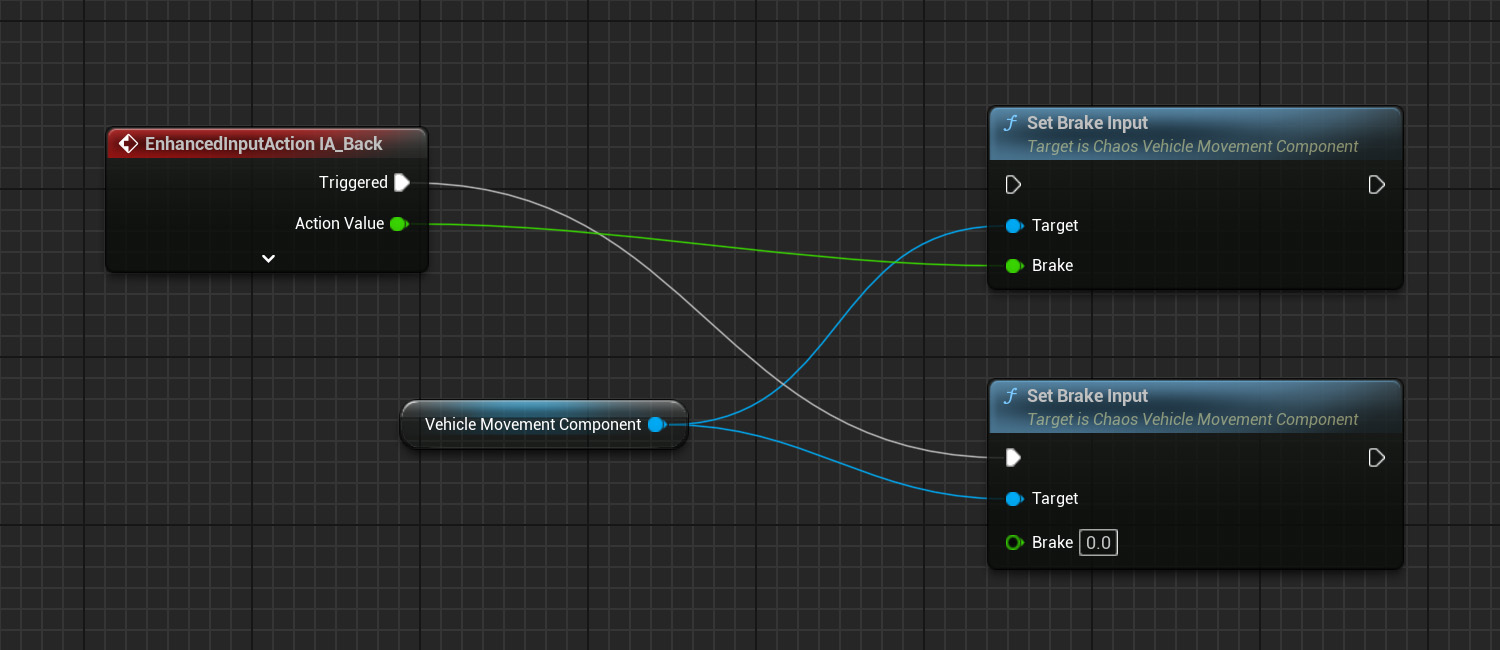
バックの動作(ブレーキとバックの整理は次回やります)
ゲームモードを作って動作を確かめる
ここまでの作業が上手くいっているか確認するためにゲームモードのBPを作成する。
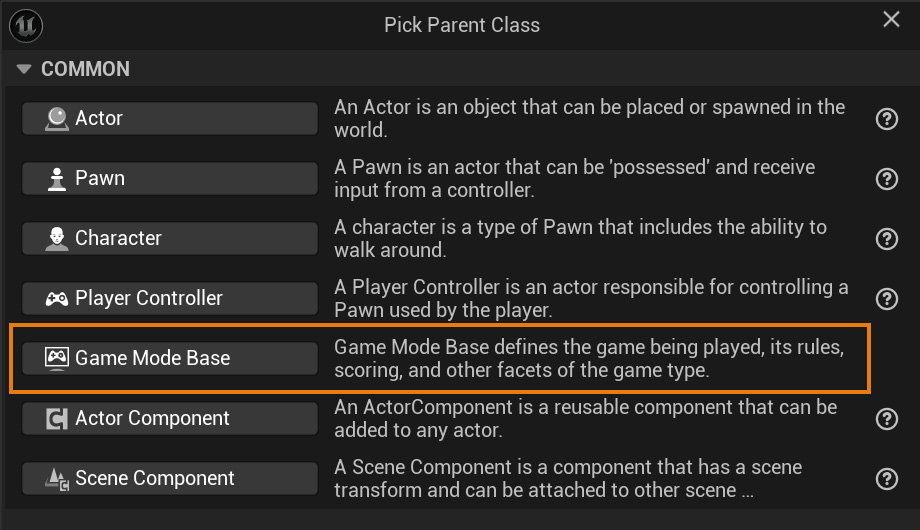
Game Mode Baseを選び、
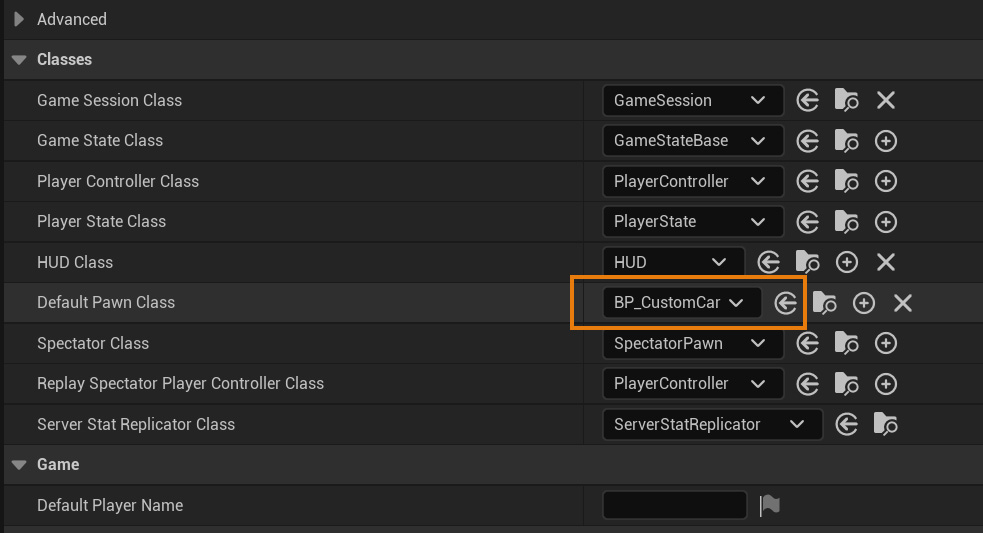
Pawn BPをセットする。
World Settings > Game Mode > GameMode OverrideにゲームモードBPをセットしてゲームを実行する。
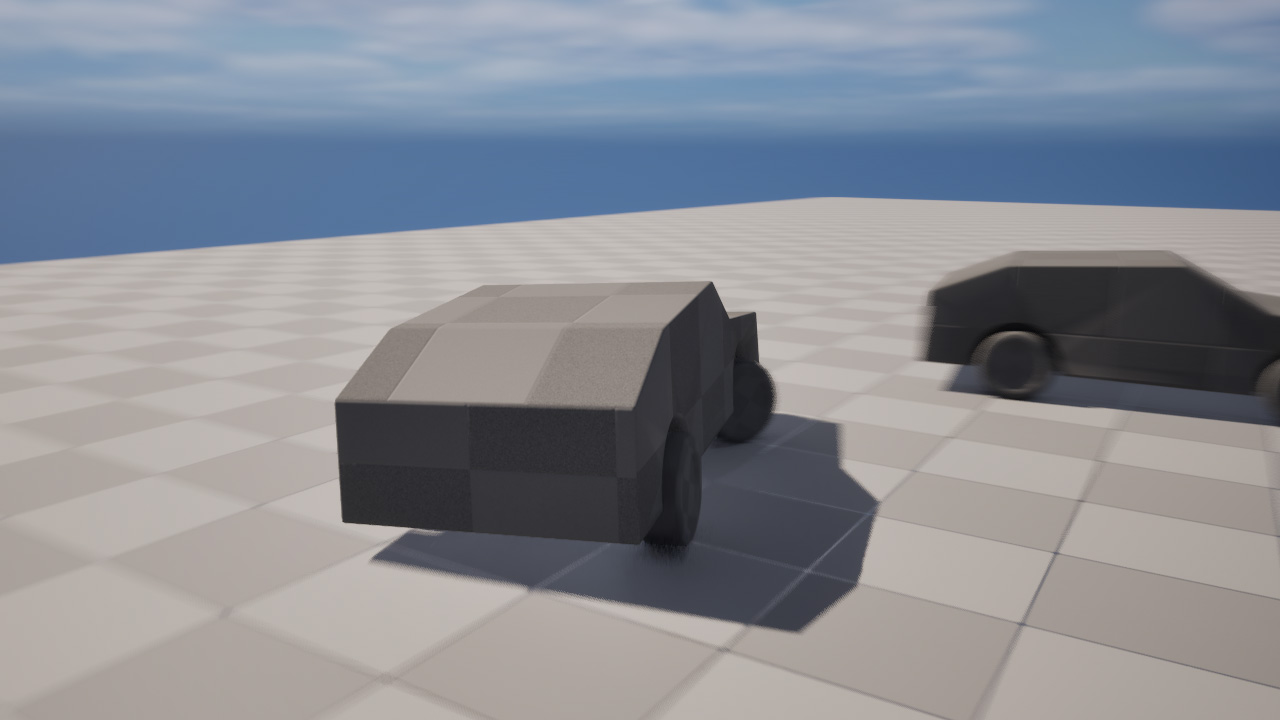
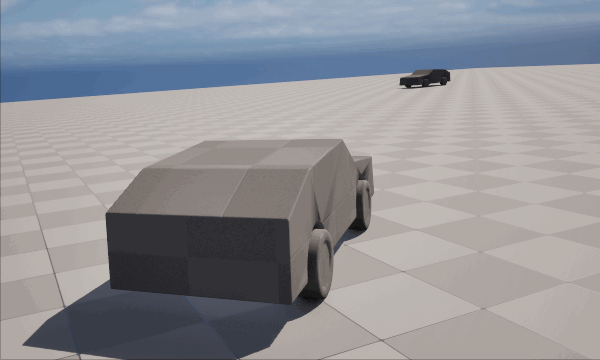
車輪は動かないが、前進したり、ハンドルを切って動けることを確認する。
車輪のアニメーションの設定
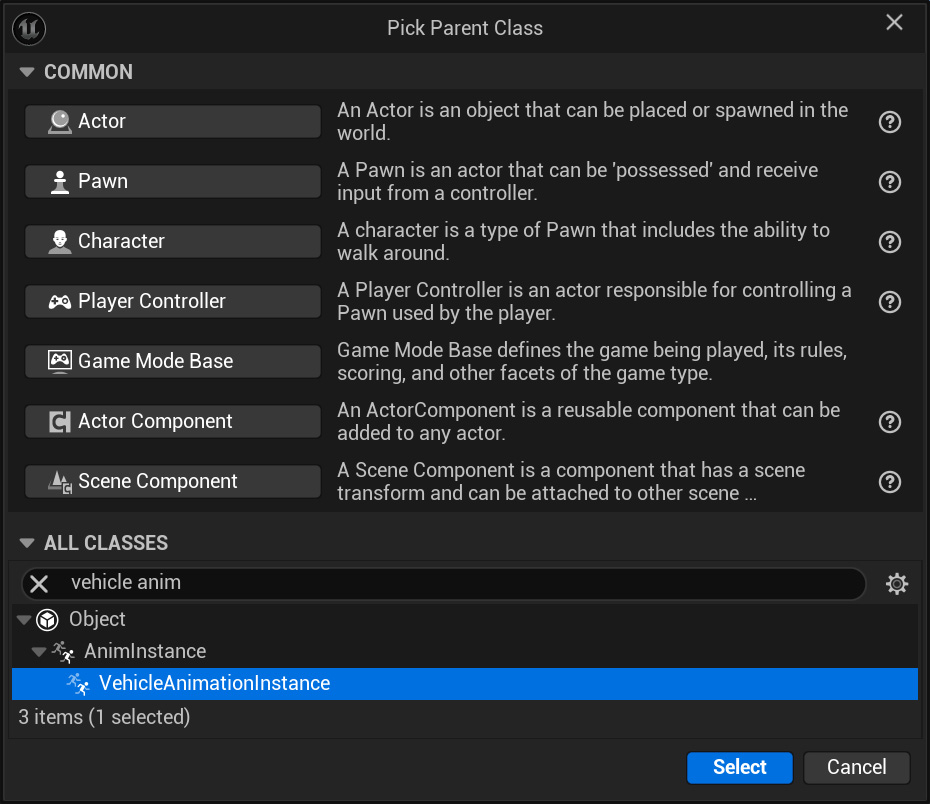
VehicleAnimationInstanceクラスのBPを作成する。
開いたらノードをこのように設定する。
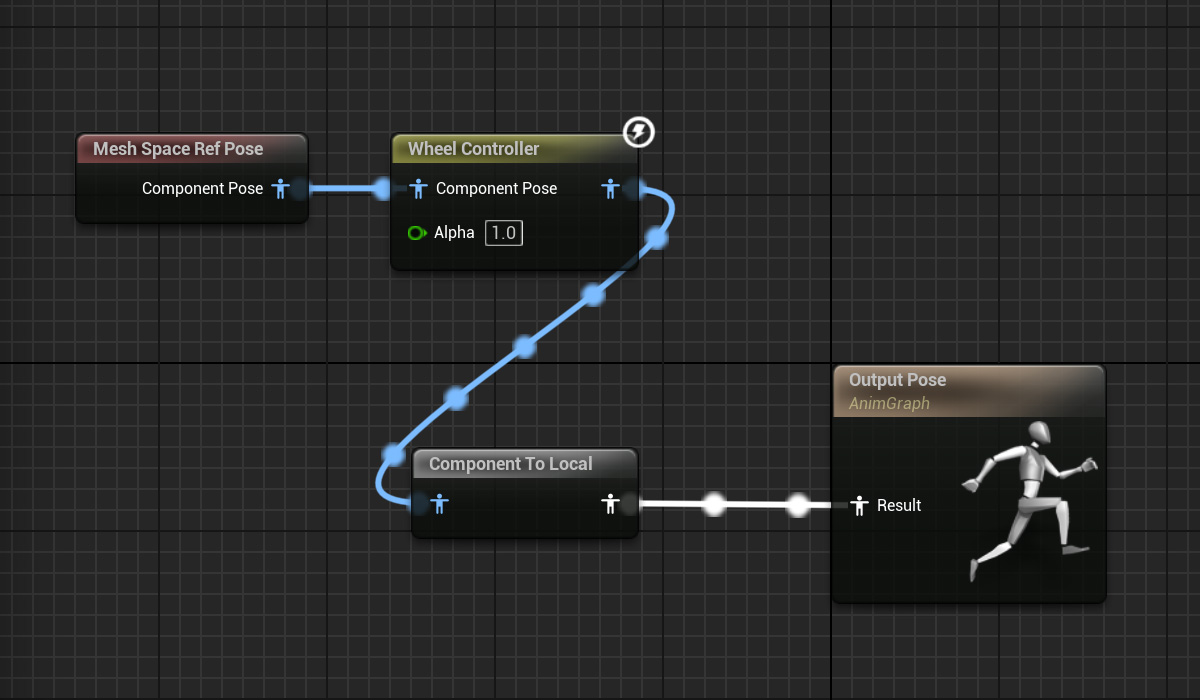
Pawn BPを開いて、Animation > Anim Classに作成したBPをセットする。
ゲームを実行して、車輪も動いていることを確認する。
参考
公式のドキュメントと動画が分かりやすいです。
dev.epicgames.com/documentation/ja-jp/unreal-engine/how-to-set-up-vehicles-in-unreal-engine?application_version=5.3
www.youtube.com/watch?v=Wc6lUXOhRO0