環境:9.5.1
簡単なビルボード草を作成する。
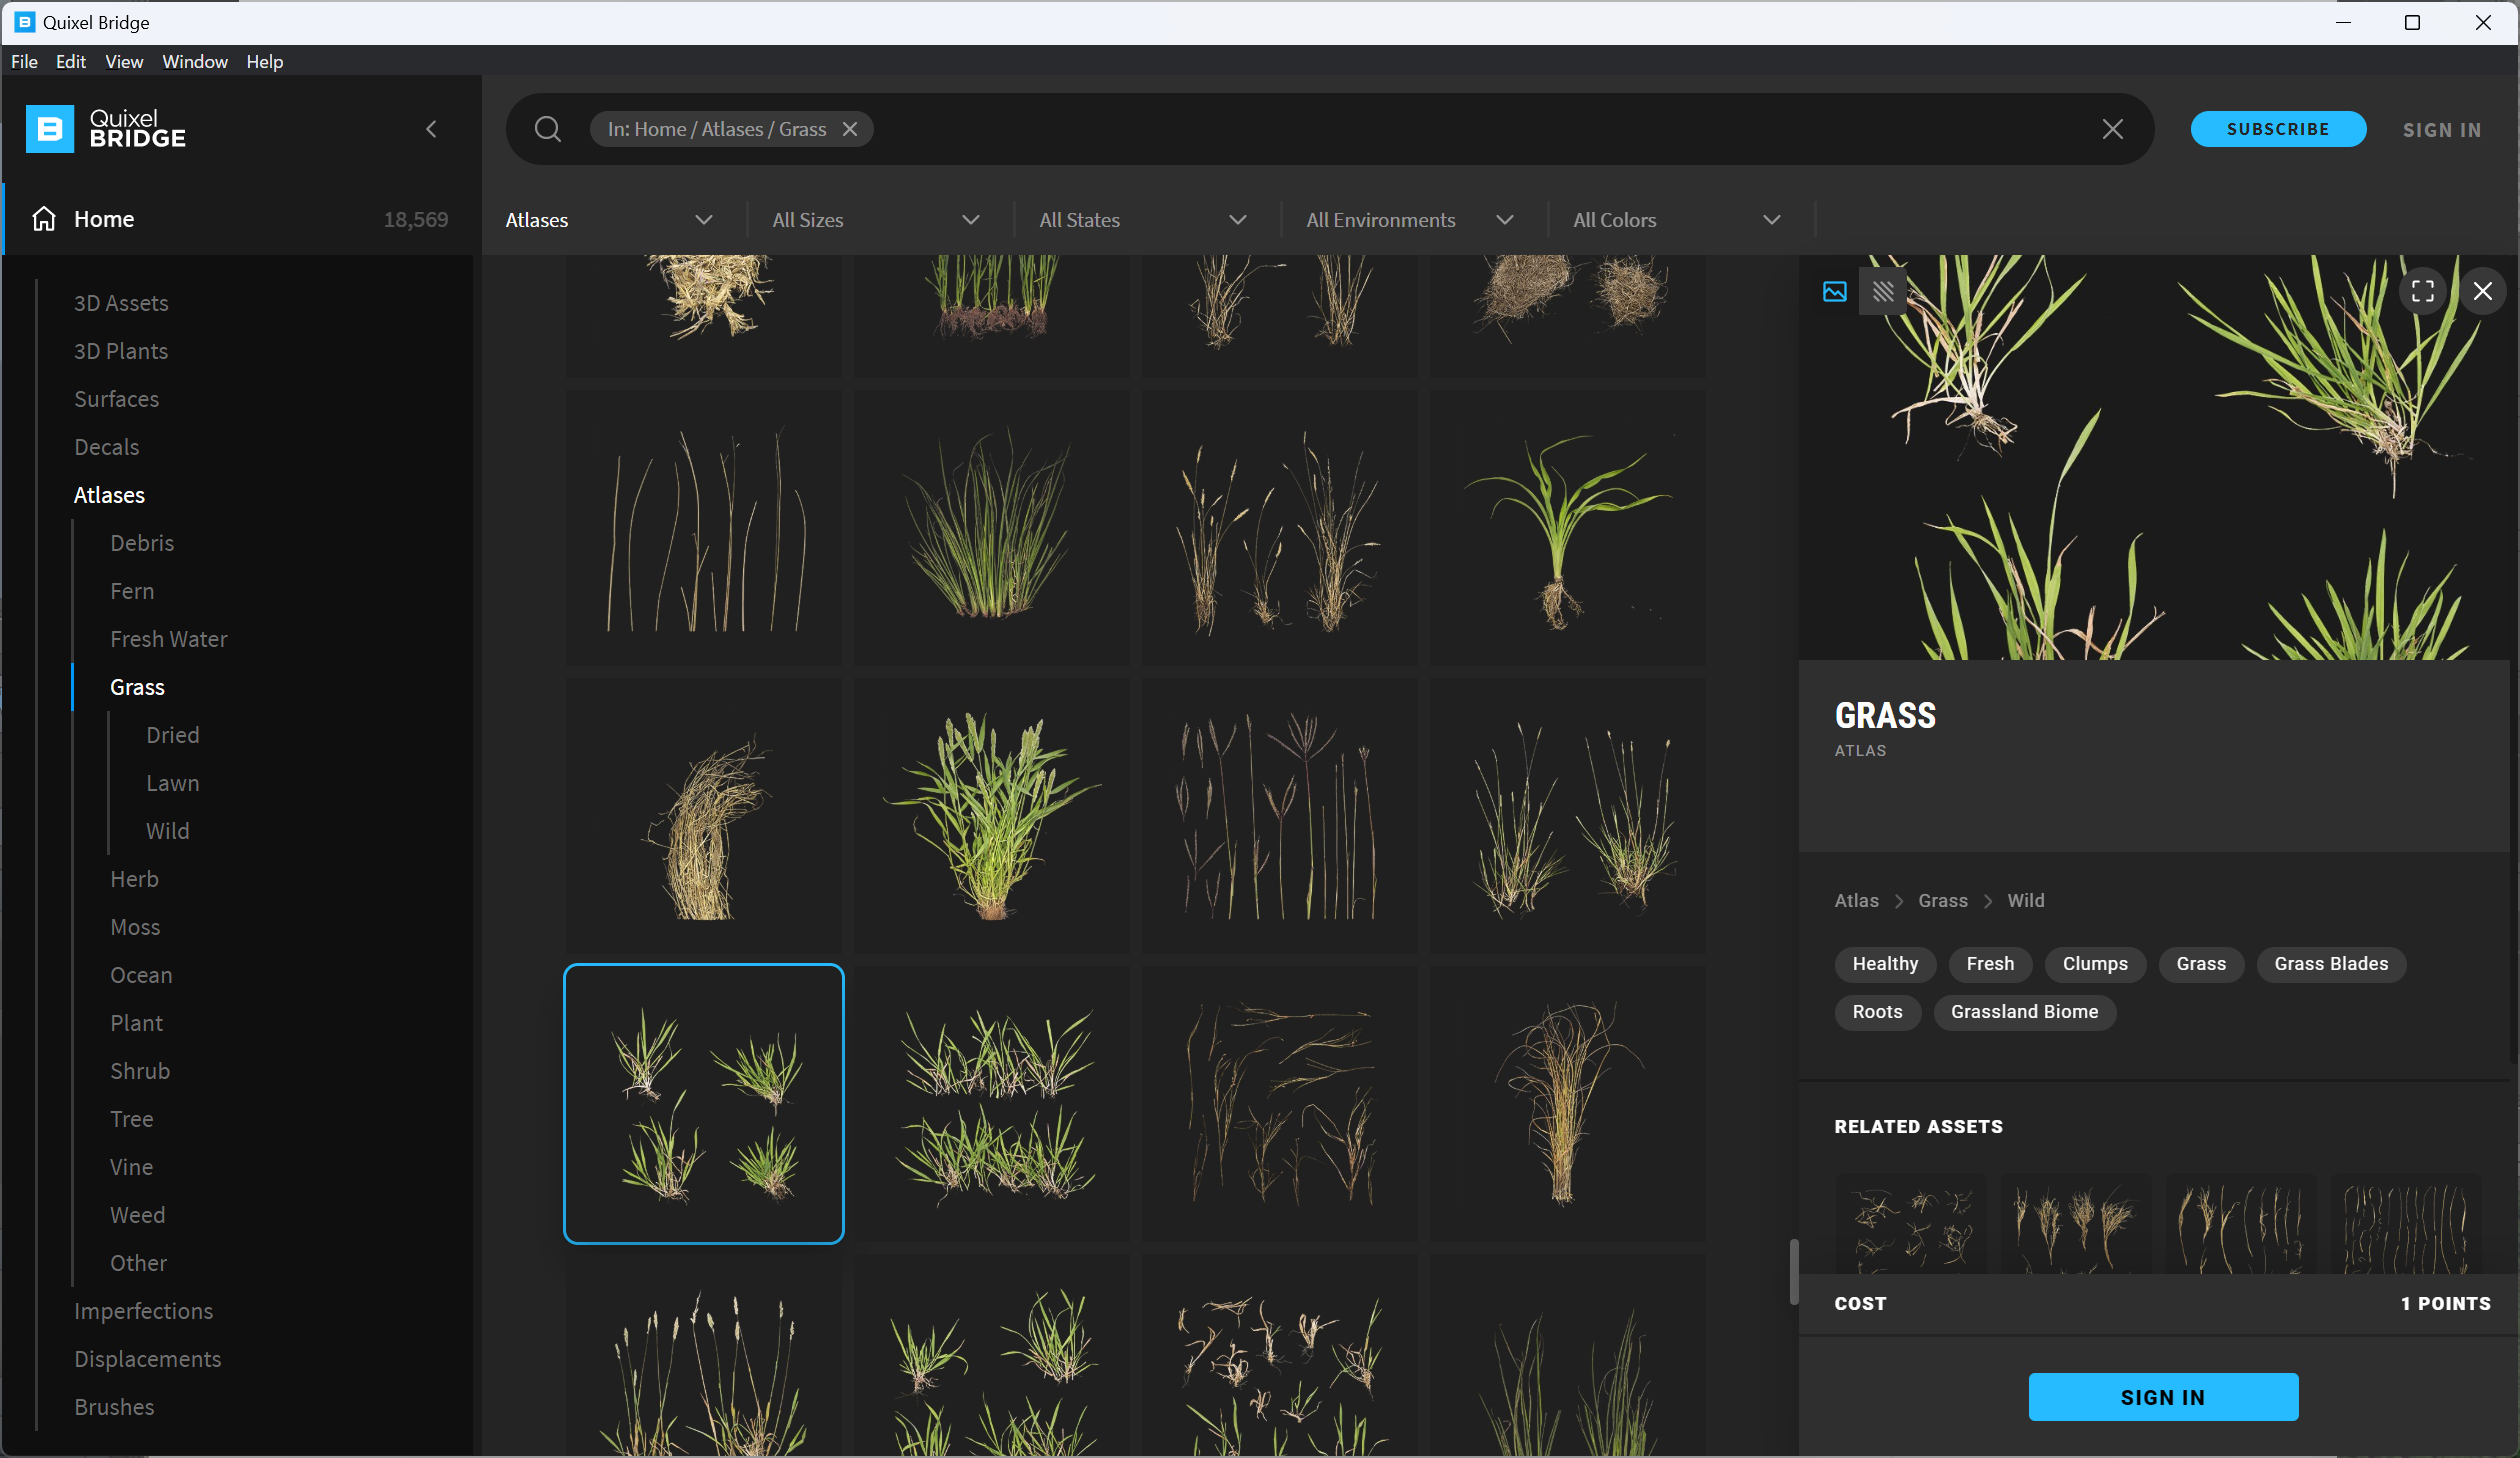
Megascansのアトラスから適当なアセットを選ぶ。
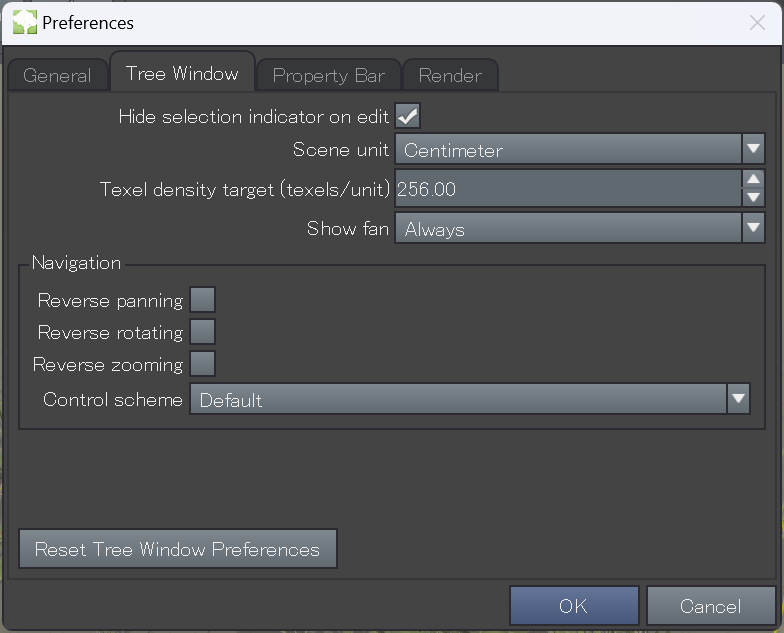
SpeedTreeを起動し、Edit > Preferencesで単位をFootからCentimeterに変更。
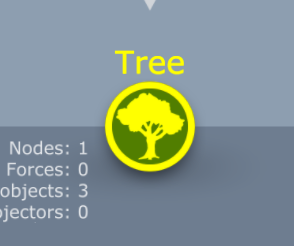
左上のTreeアイコンで大元の設定を行う。
Shape > Radius
150などを入力。半径150cmの半径になる。
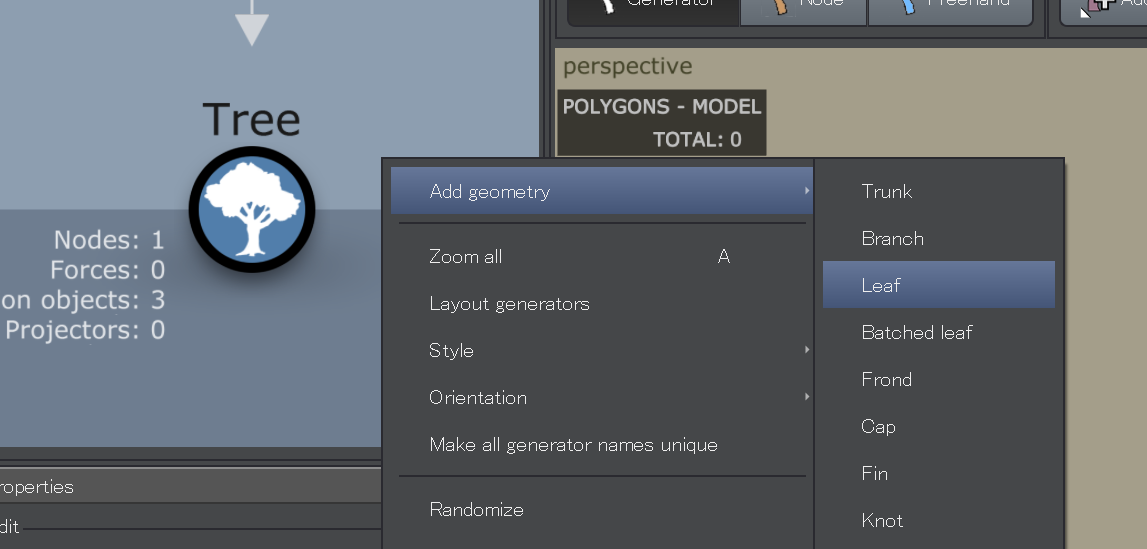
右クリックでAdd Geometry > Leafを選ぶ。
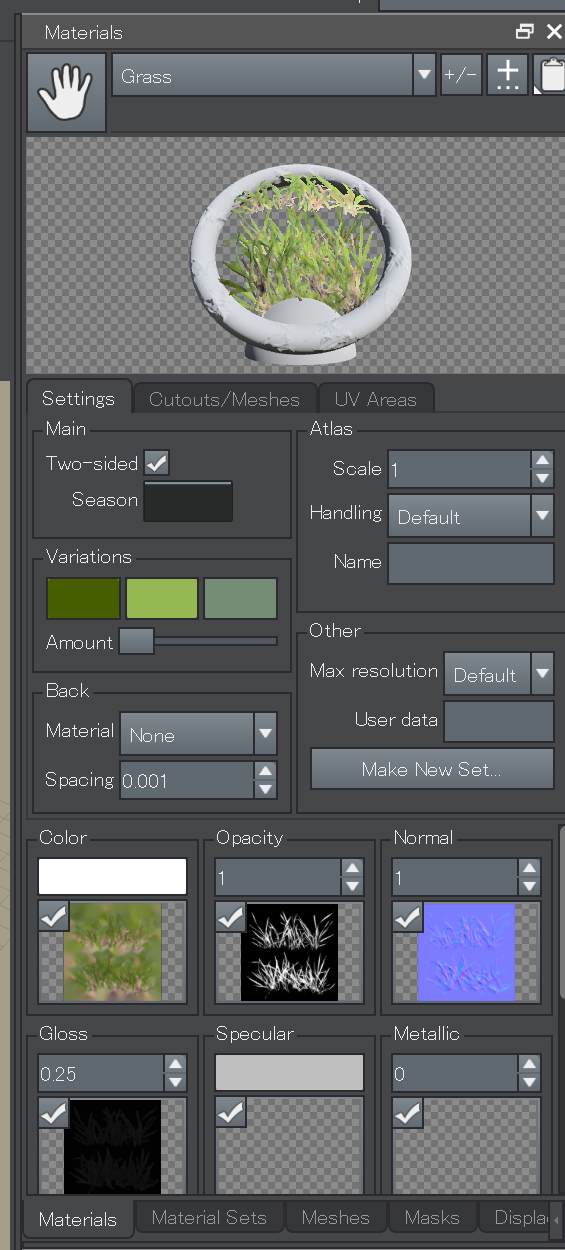
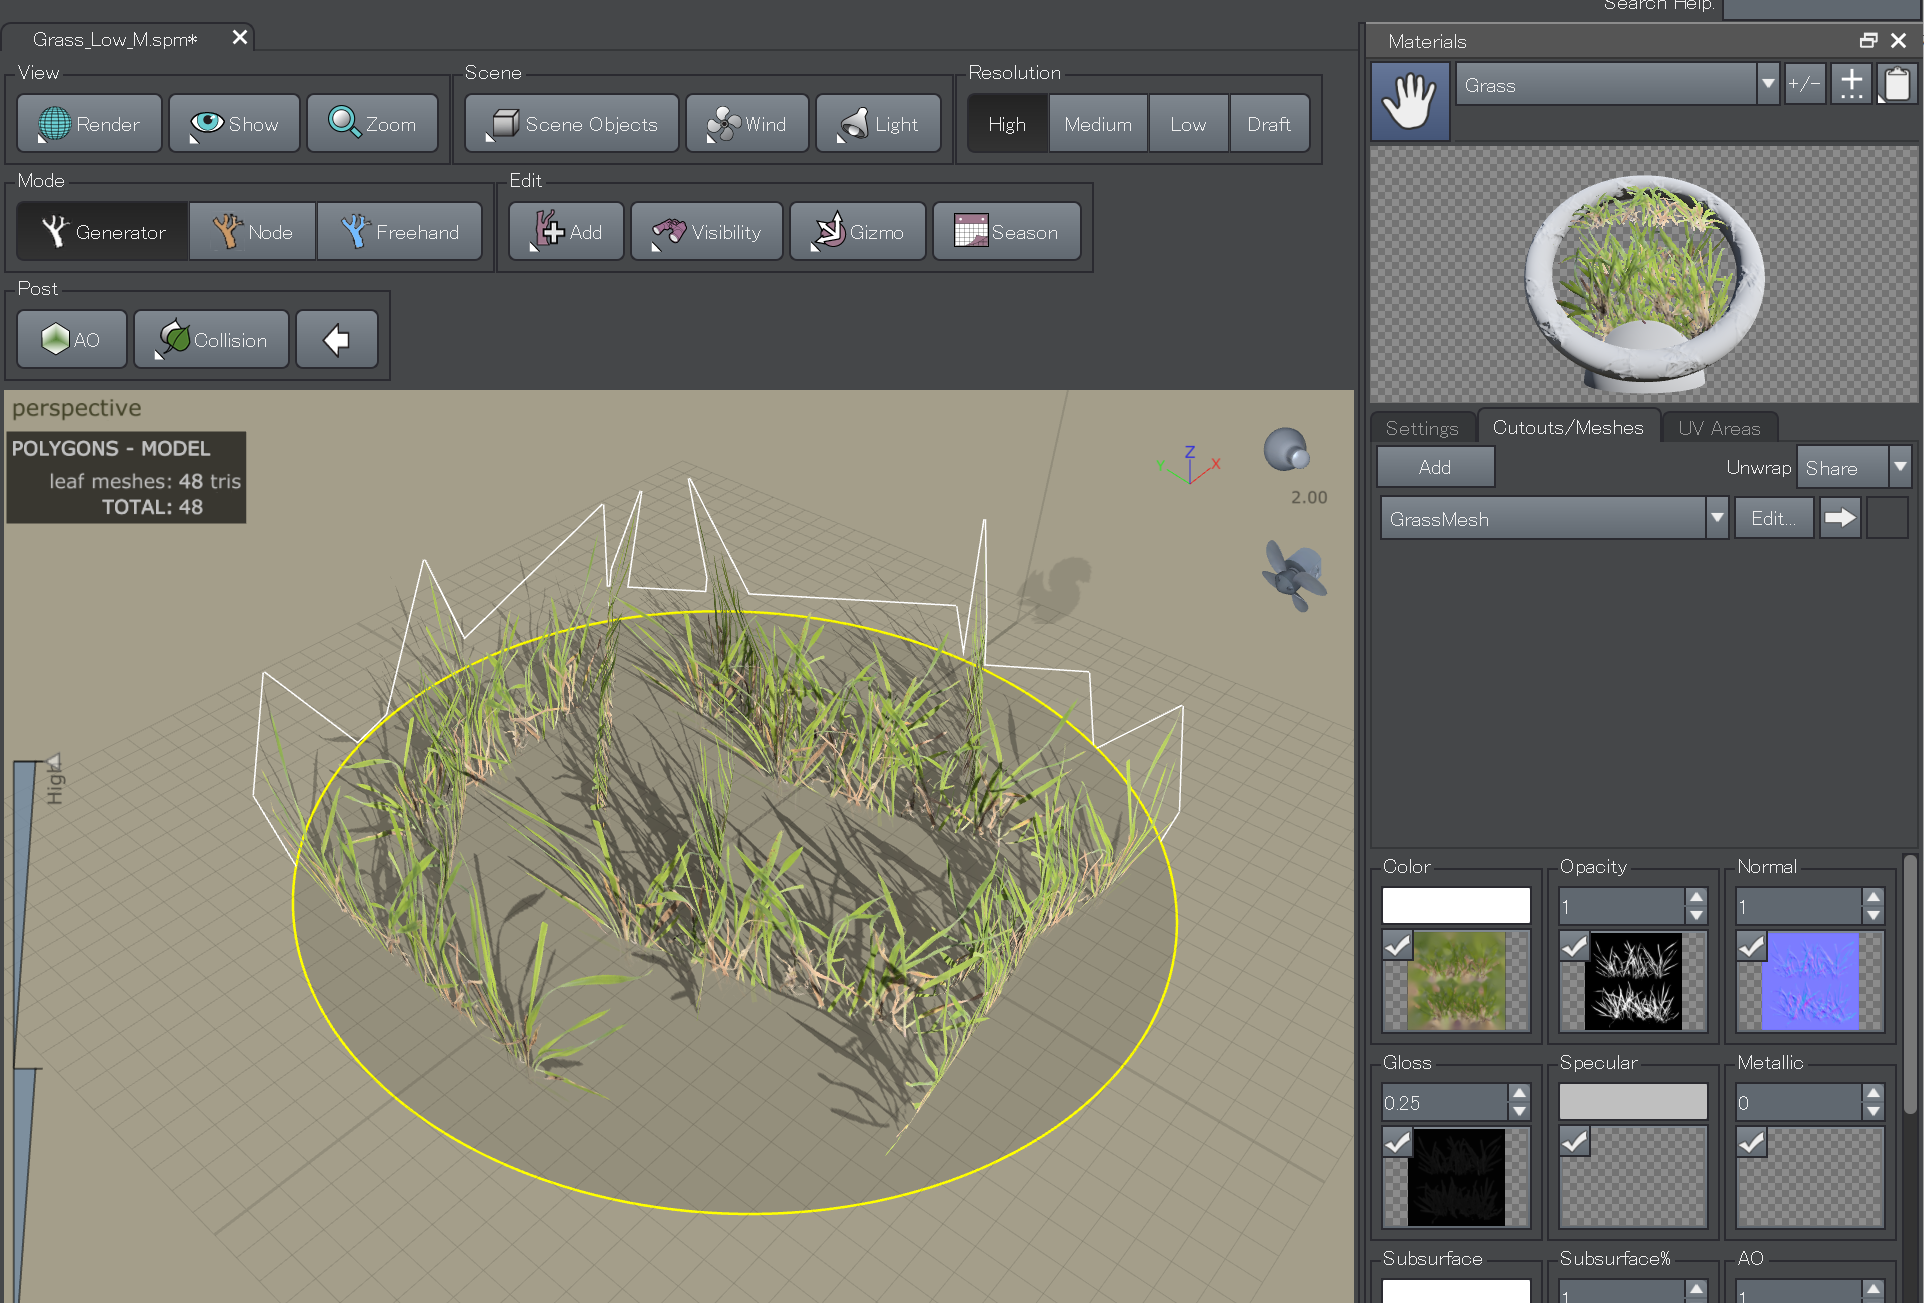
マテリアルの設定をする。「+/-」アイコンをクリックし、追加する。Megascansの各テクスチャーをドロップしていく。
次に、メッシュを作成する。Meshesタブをクリックして、「+/-」アイコンをクリックし、追加する。
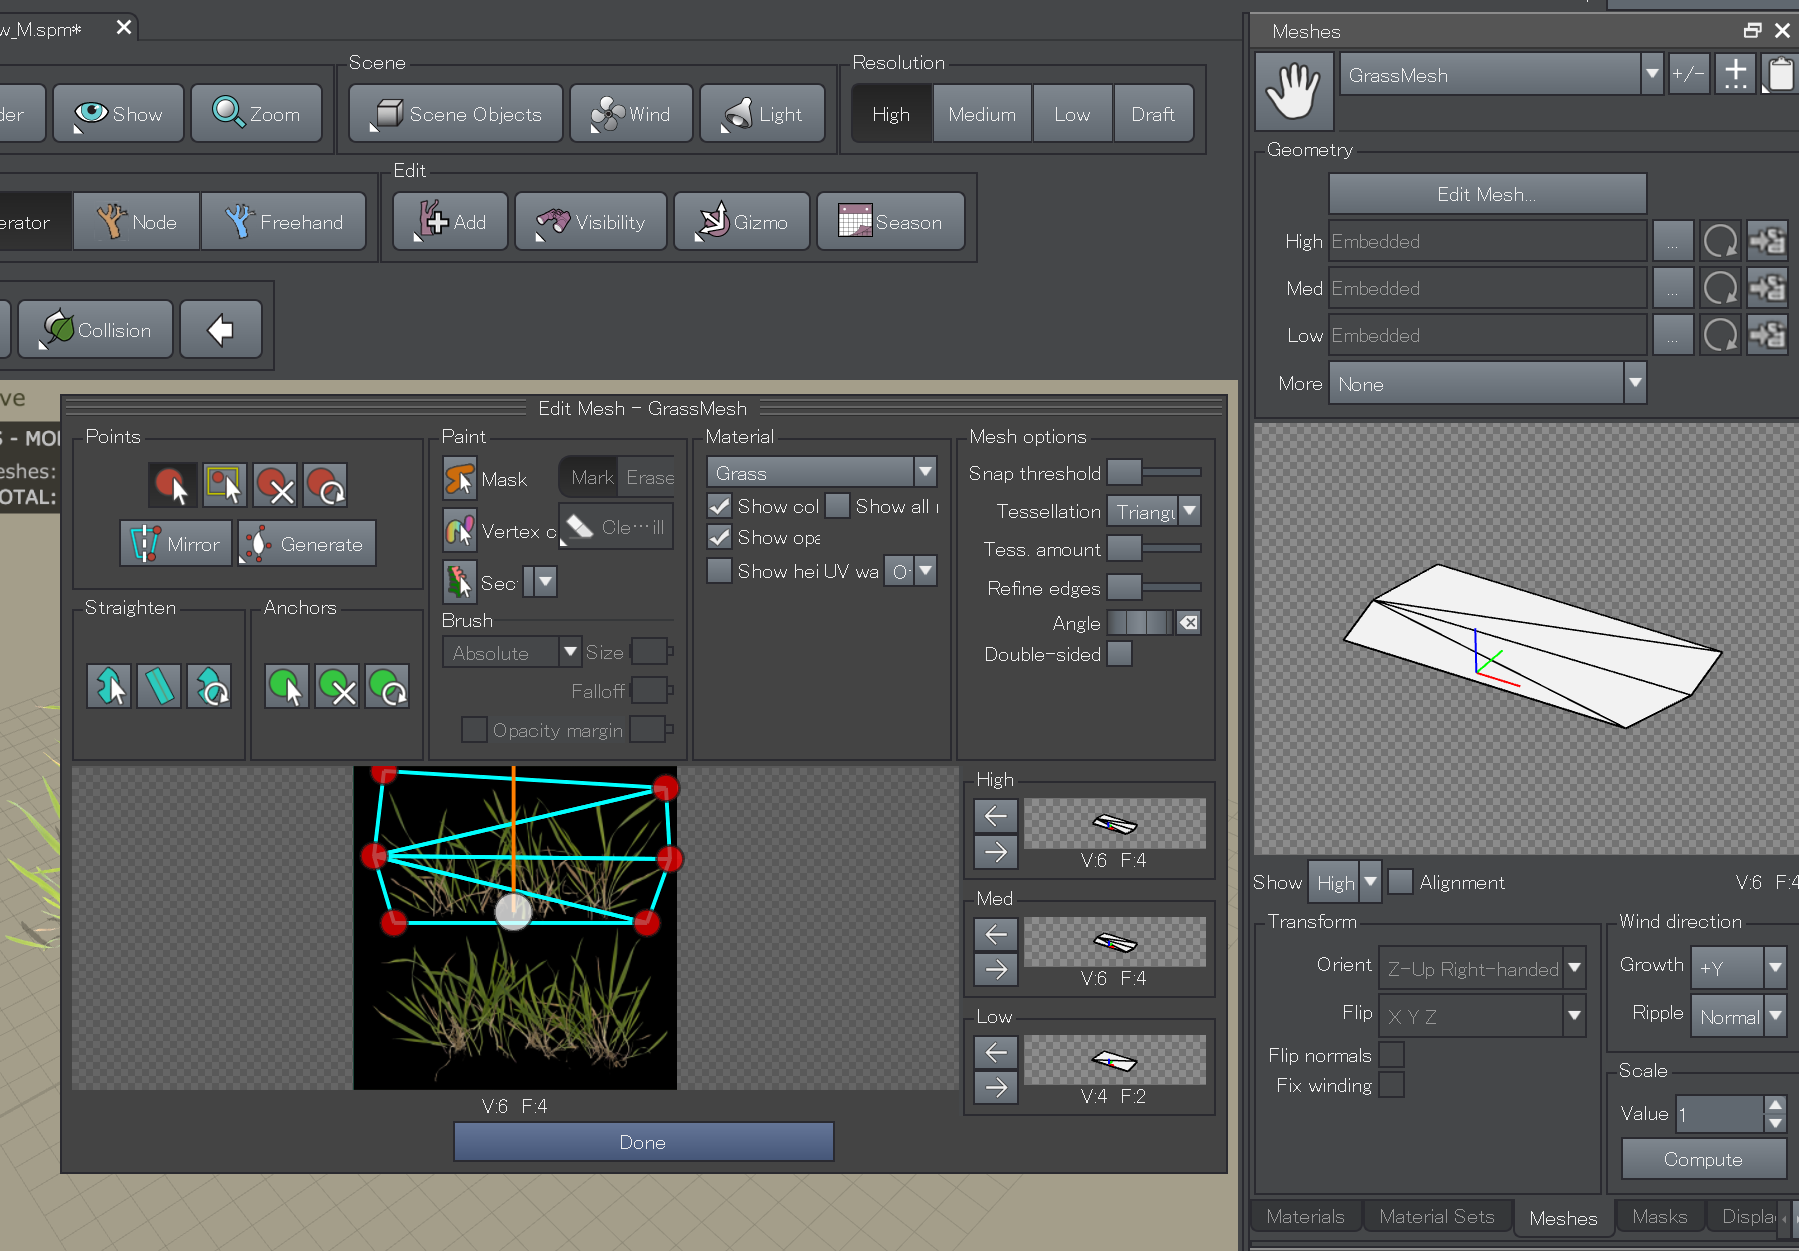
Edit Meshボタンをクリックし、出てきたウインドウでメッシュ形状を作成する。MaterialにGrassを選ぶと先ほどのマテリアルが表示されるので、それに合わせて整える。出来たら、High、Med、Lowに矢印アイコンで割り当てていく。
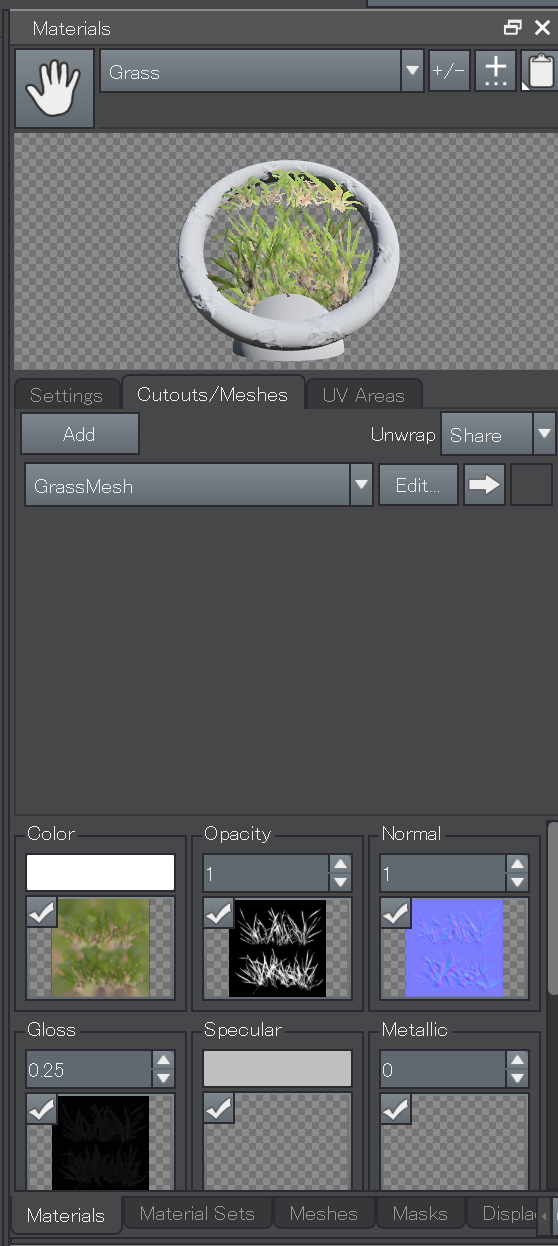
マテリアルに戻り、Cutouts/Meshesタブを押し、先ほどのメッシュを割り当てる。これでマテリアルの準備が整った。
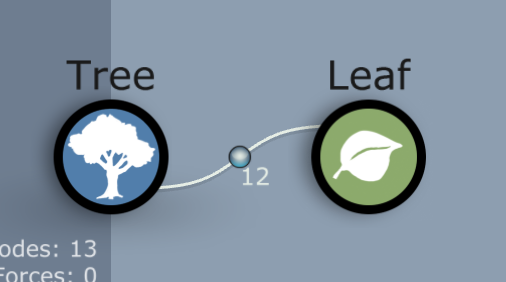
Leafアイコンをクリックし、
Generation > Numberに12を設定し、使う枚数を設定する
Generation > BoundariesのFirst、Lastに0.25、0.75を設定して座標を調整
Generation > Size scalarに100を入れて大きさを調整
Orientation > Final AdjustmentsのOutに0.5を入れて縦に回転し、Upで位置を調整
Orientation > DeformationのFoldに0.08、Twistに0.1、Curlに-0.1等を入れて形状を歪ませる。
マテリアルの手のひらアイコンをドラッグして、ポリゴンにドロップすることで、メッシュとマテリアルが適用される。
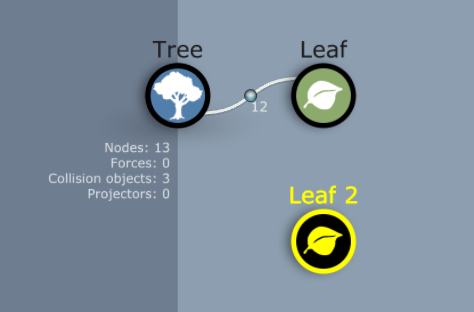
Leafアイコンを右クリックしてDuplicateで複製し、複製されたLeafアイコンをTreeアイコンにドロップすることでつなげられる。
Orientation > Final AdjustmentsのRightに0.5を入れることで十字に配置される。
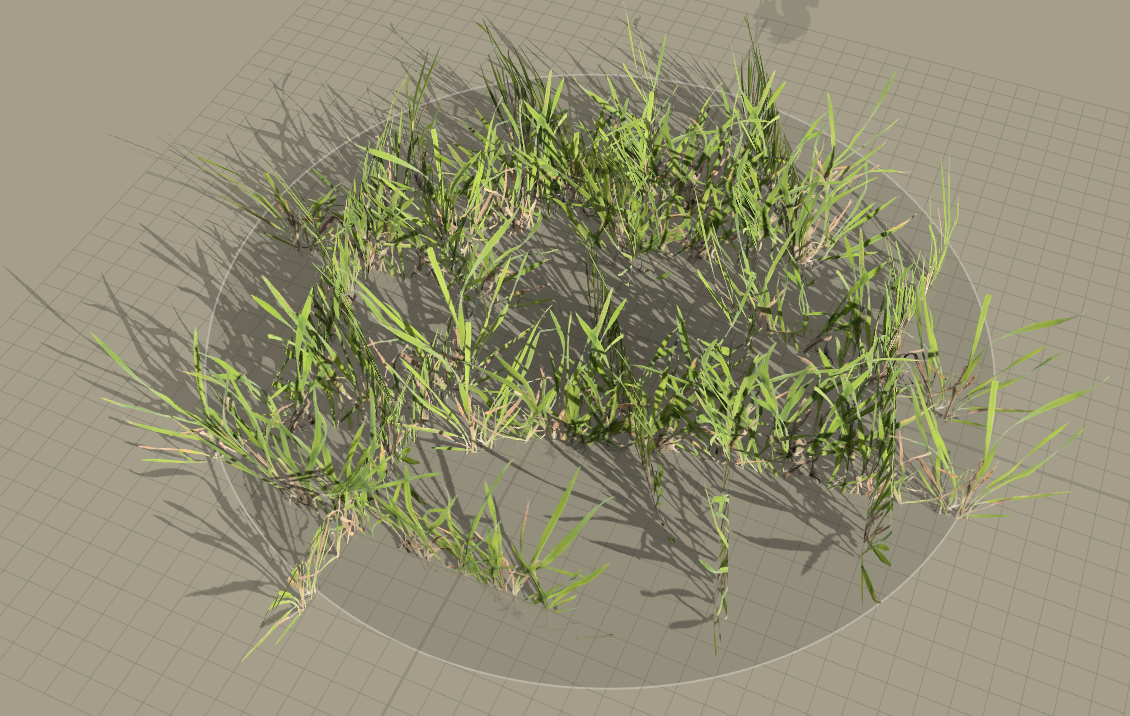
マテリアルとメッシュをもう1パターン作成しておいて割り当てればリピート感が軽減する。
UEへエクスポート
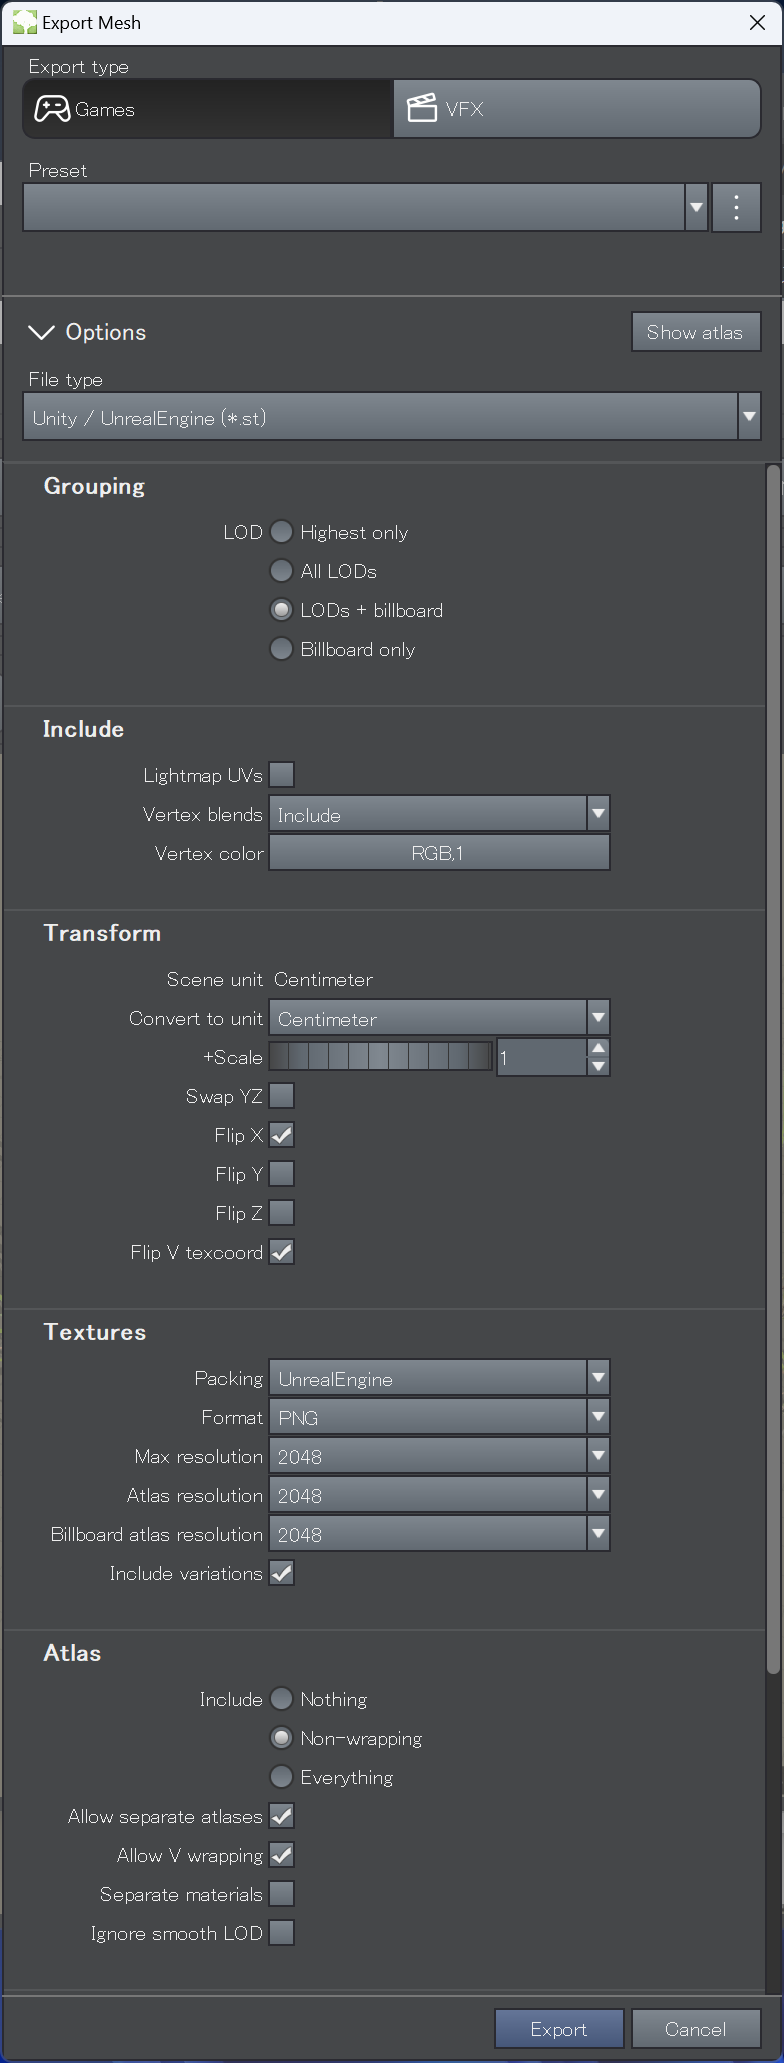
File typeはUnity/UnrealEngine
GroupingはLODs + billboard
これでstファイルが生成されるので、それをUEにドロップすればインポートされる。以降はメッシュのReimportで更新できる。